Most real-world applications need a user login. However, setting up user authentication and management can take considerable time. And it is like reinventing the wheel every time.Here comes to our rescue a managed service from Amazon Web Services: COGNITO USER POOLS![]()
What is a Cognito User Pool?
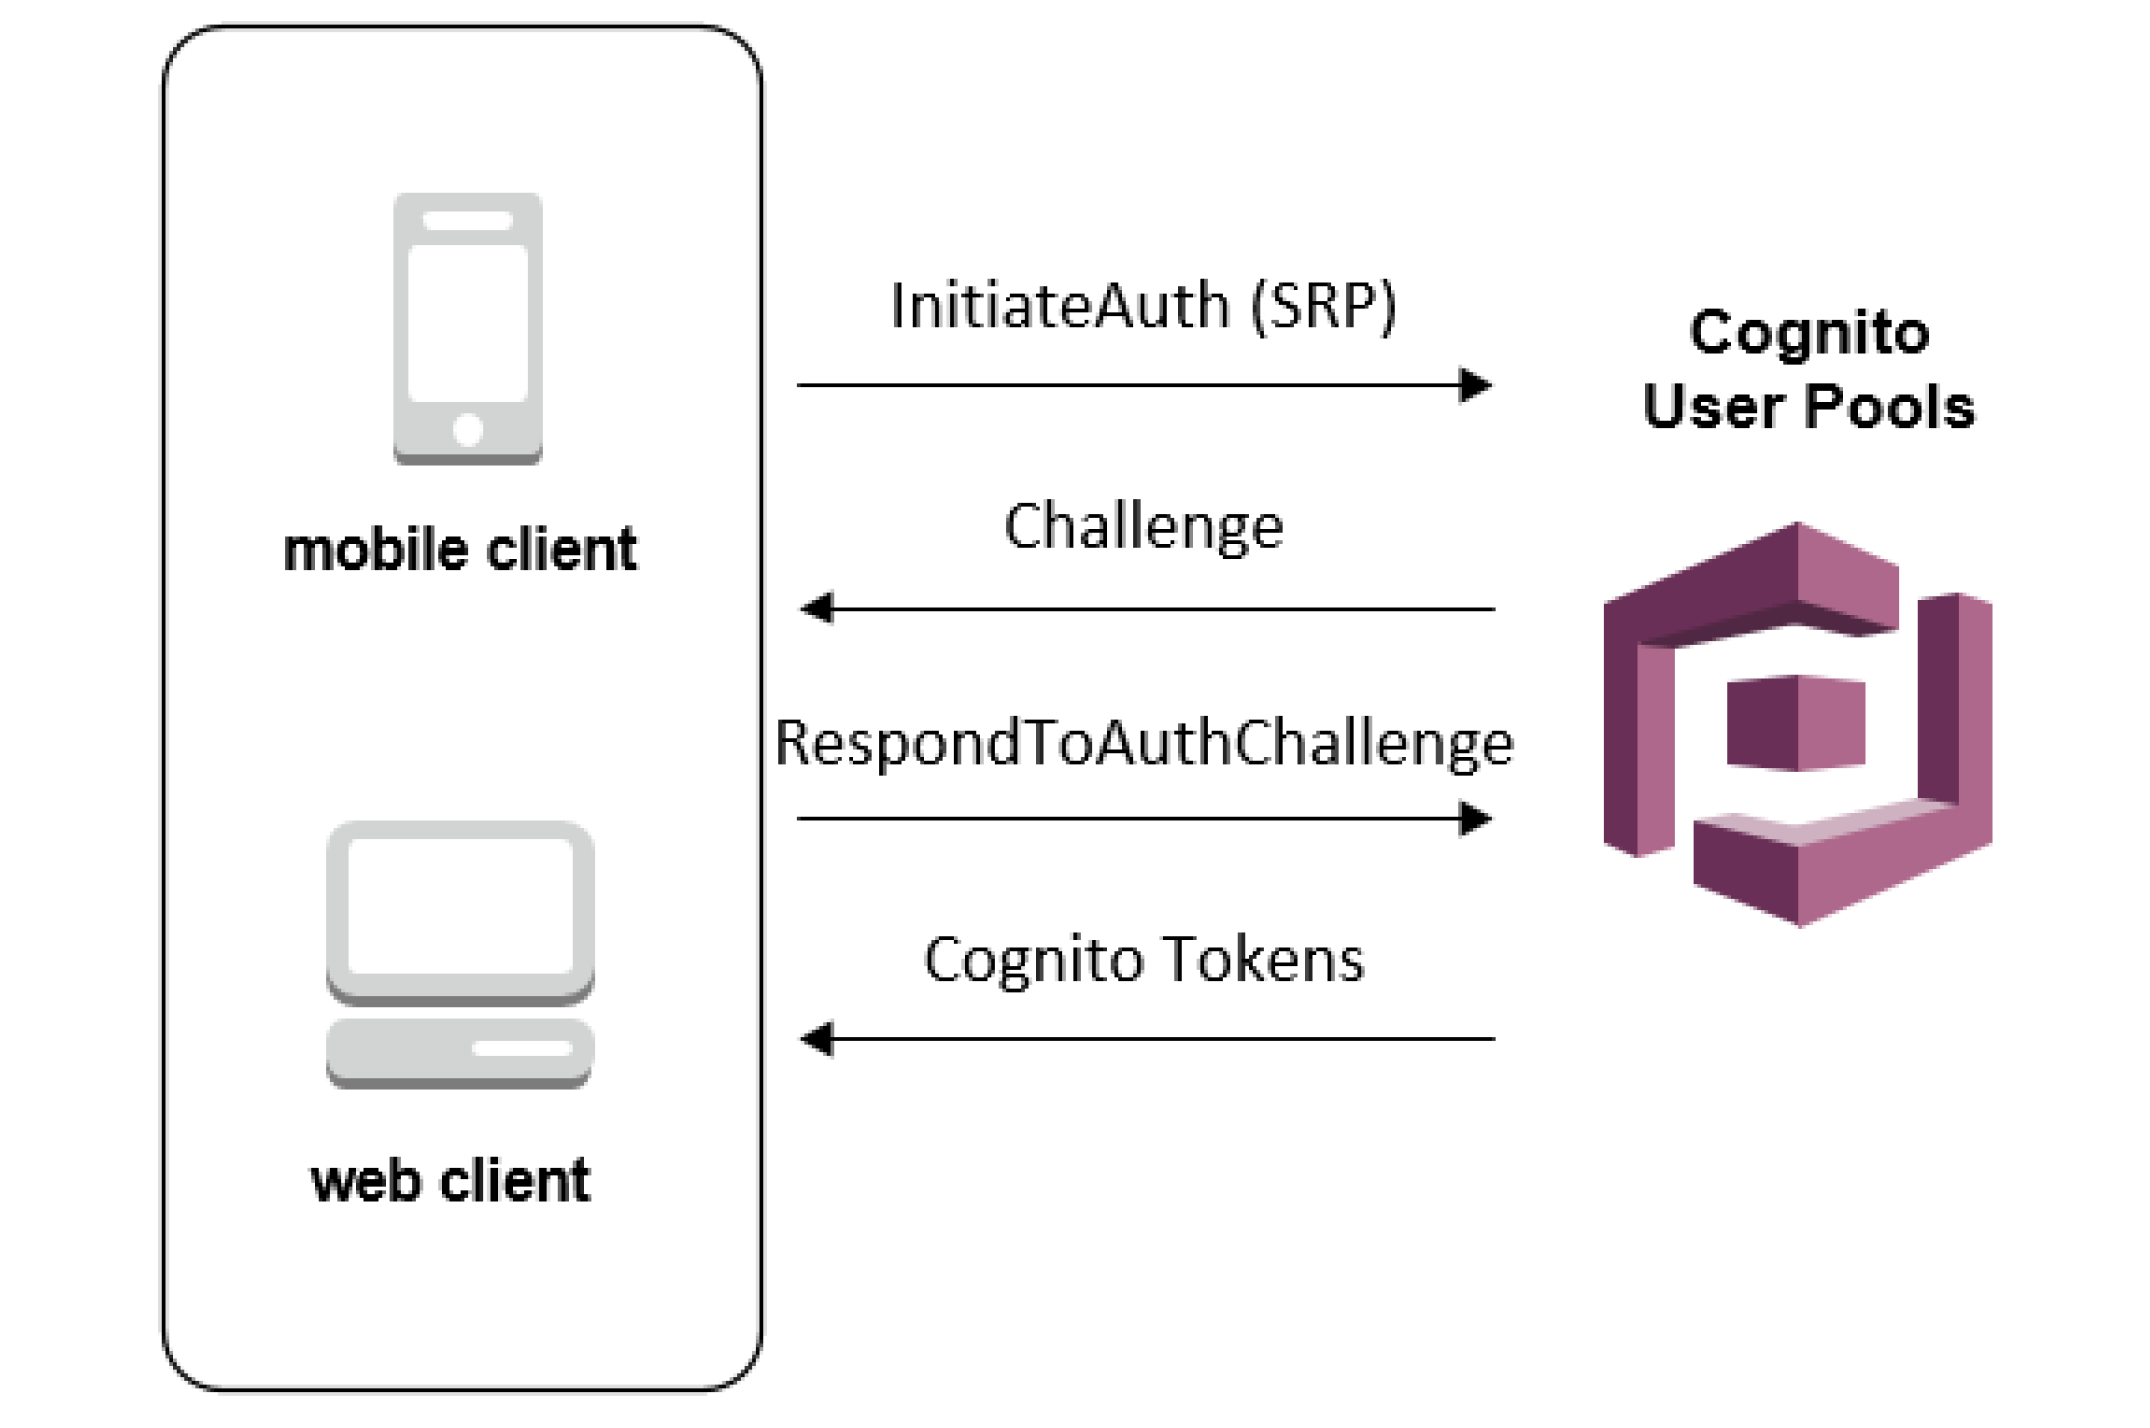
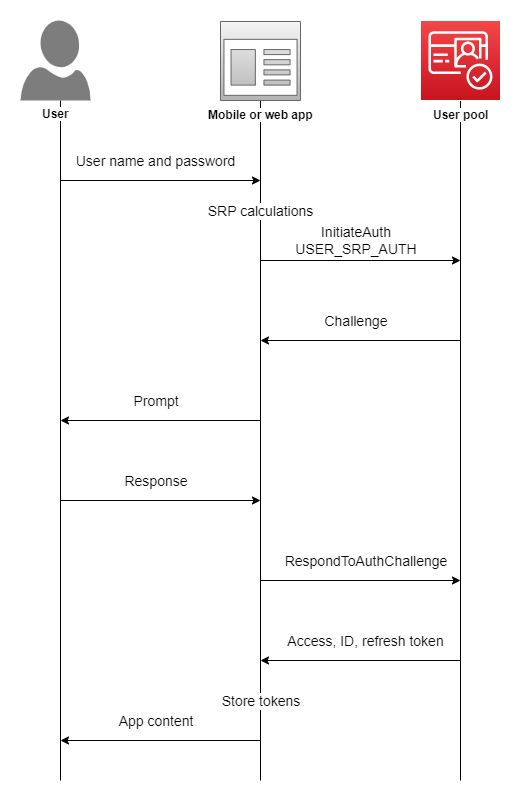
Amazon Cognito User Pool makes it easy for developers to add sign-up and sign-in functionality to web and mobile applications. It serves as your own identity provider to maintain a user directory. It supports user registration and sign-in, as well as provisioning identity tokens for signed-in users.
By using Cognito, you can set up your own user sign in, signup flow with MFA. All this without writing a single line of backend code.
And integrated with AWS ecosystem, it opens up a whole lot of possibilities for front end applications as you can connect with AWS S3, AWS App sync, APIs, Analytics, Push notifications, etc.
AWS also provides an SDK: Amplify in order to connect with some of the AWS services. So all you need to do is call SDK methods from your application and voila! it’s done.
So let’s get started with setting up Cognito.
Initial setup
We will be using the User Pools to setup custom login for our application.
User pool is basically the collection of users on your application. You can also add users in different groups, like for a healthcare application, you can create 2 groups: Patients and Doctors which can be used to allow different actions for both types of users.
Let’s first make a user pool by clicking on “Manage your User Pools”.
We’re gonna walk through this process step by step, so enter the Pool name of “App Users” and click “Step through settings”.
The next step is “Attributes”, where we define the attributes that our “App Users” will have.
Here you can select how do you want your users to sign in: using a username, or an email, or a phone number.
Here we will select login using email as their username.
Next Cognito provides a list of standard user attributes which you can select to add in your user details. You can also add any custom attributes if you want.
Next, on Policies, we can select a password policy for the users. Currently, we have selected only a minimum length of password but you can add more conditions also.
We can also select whether we want to allow users to sign themselves up or only admin can add a user. We will cover the differences in the final application flow later depending on the choice made.
Under MFA and verifications, we can enable multi-factor authentication if needed. And we can also select if we want the users to verify their email in order to confirm their account.
So the last important bit for our application is adding a client application which will be using Cognito in order to authenticate its users. We will set the refresh token to 30 days, which means each login attempt will return a refresh token that we can use for authentication instead of logging in every time. We un-click “Generate Client Secret” because we intend to log into our user pool from the front end instead of the back end (therefore, we cannot keep secrets on the front end because that is insecure)
Click “Create App” and then “Next Step” to move on to–Triggers.
We can trigger different actions in user authentication and setup flow which can be configured here. A simple example could be to send the user a welcome message on signing up.
For the scope of this tutorial, we will not be using any AWS Lambda triggers. Let’s move on to the final step: Review.
- Here we review all the setup configurations we have made. And hit “Create” to generate the user pool.
- Take note of the PoolID from the Pool details tab.
- And the app id from the Apps tab. You will need these in your front end application to connect to this user pool.
- The last thing left to setup is an identity pool.
Amazon Cognito identity pools (federated identities) enable you to create unique identities for your users and federate them with identity providers. With an identity pool, you can obtain temporary, limited-privilege AWS credentials to access other AWS services. Amazon Cognito identity pools support the following identity providers:
- Public providers: Login with Amazon (Identity Pools), Facebook (Identity Pools), Google (Identity Pools).
- Amazon Cognito User Pools
- Open ID Connect Providers (Identity Pools)
- SAML Identity Providers (Identity Pools)
- Developer Authenticated Identities (Identity Pools)
In short, we can say that while User Pool is used for authentication and user registration, identity pools are responsible for authorization to allow different users access to different AWS services by assigning them different IAM roles.
Go to Federated Identities and begin the process to create a new identity pool. Give it an appropriate name.
Now under the Authentication providers section, we will add the Cognito user pool that we just created. Copy the pool id and the app client id. And if we wanted to allow Facebook login or any other login, we just need to add the app id in the respective section and that’s all.
On saving the identity pool, you are redirected to the next screen which creates the IAM roles. Here we can assign different roles to authenticated and unauthenticated users to authorize them to access other AWS services like S3, SNS, etc.
We just need to note one more thing that is used in our front end applications, i.e. the identity pool id which can be found at the below location.
This was all for the Cognito setup. With this our backend system to manage users and authentication is complete. We now have a fully functional User authentication and authorization service with the following features and without any code:
- Users can sign themselves up
- User creation by admin with temporary passwords
- Multi-factor authentication
- Phone number and email verification
- Forgot password
- Social login

