How to measure success of a conversational AI chatbot

Last year when one of our healthcare partners (we refer to our clients as partners) was looking to build a conversational AI chatbot, I was apprehensive about guiding them. I had only worked on the level 2 (out of the 5 levels of conversational AI) type of bots. But this time our partner wanted to build a contextual/consultative AI-powered chatbot assistant.
To Build a Successful Chatbot…. Start with these 5 questions. | by Yogesh Moorjani | Chatbots Magazine

I was concerned about how the bot would understand end users’ problems. What features can we build to make it more humanistic? Would it be successful in replacing human care and compassion? Would it replicate the same emotions of empathy, compassion, and care?

And even if we managed to do everything, how would we know if the conversational AI chatbot is working the way we designed it? How would we define the ‘success’ of our initiative?

My apprehensions became real when I read a Forbes article about chatbots killing customer service with their clumsy conversations and limited learning capabilities. After reading the below paragraph, I realized the problem-

“The AI didn’t always get it, which was frustrating. Even more irritating — the company using the chatbot seemed to shrug the problem off. I detailed my own experience using Skyscanner’s chatbot, which often misunderstood my requests. Some of the companies I mentioned in the column appeared to shrug off my concerns.”

The problem is with organizations/management who choose to look away and see the importance of data analytics in chatbots for healthcare. They think that understanding the users’ behavior, what disappoints them, what makes them happy, is beyond the scope of their work. Because of this mindset, chatbots are still a lost cause.

Is there a solution in sight?

Yes, indeed there is. We’re at a very interesting place where we hold the future of chatbots in our hands. To make chatbots more welcoming and user-friendly, we not only need to make its software side–engineering, UX design, security– more robust. Rather, we should strive to make data analysis a part of the development process– i.e. we must constantly monitor chatbot’s effectiveness and improve features as per users’ needs.

How can we measure a chatbot’s efficiency?

Building a good conversational AI healthcare chatbot is a daunting task. Even after launching it as a service, one can’t be sure of its success. That’s why it’s crucial to measure every interaction with the end users.

There are certain indicators that one can track to see if the chatbot is serving its purpose.

8 Ways to Improve Chatbots and Boost Customer Satisfaction

Botanalytics

Botanalytics - Event / Speaker Platform

If you’re looking for a tool that gives you an overview of the user’s lifecycle, then Botanalytics is for you. It’s a great tool for identifying bottlenecks in the user’s journey. You can deep dive into every conversation (transcripts are available for each conversation) and see where your bot failed to respond.

You can set various goals and categorize chats into conversation paths. This is a great feature as it helps you examine which conversation attained its goal and which didn’t.

For example- if your goal is to make users download your mobile app through the link provided in the chat, then this tool will show you how many conversations ended up in accomplishing that goal.

You can also set conversation paths and check how many conversations were successfully handled by the chatbot.

Grafana

GitHub - grafana/grafana: The open and composable observability and data visualization platform. Visualize metrics, logs, and traces from multiple sources like Prometheus, Loki, Elasticsearch, InfluxDB, Postgres and many more.

Grafana is not a bot-analytics tool. Rather, it’s an open source platform that can be used to monitor applications, websites, and even custom data sources. We integrated it with our platform to use it as a chatbot analytics tool.

One of the advantages of using Grafana is that it’s very easy to customize and you can tweak its dashboard to suit your needs.

If you have a chatbot where there is a lot of data to understand, analyze, and dissect, then you must explore Grafana. Icing on the cake? It’s free. And like I mentioned earlier, highly customizable. You can create dashboards, add panels, change visualizations as per the need of evaluators and stakeholders.

Chatbase
Chatbase : New ChatBot Analytic Tool by Google | by Aydın Fevzi Özçekiç | Chatbots Magazine

Chatbase is a free cloud-based tool that allows you to integrate your bot into the analytics platform. One of the best features of Chatbase is that it helps you both analyze and optimize your bots.

In the analytics part, Chatbase has every possible feature that you can imagine- session flows, creating funnels, the grouping of not-handled messages, chat transcripts, and so on. The UI of the dashboard is quite similar to Google Analytics. So if you’re a GA user, you’ll find it easier to use it.

In the optimization part, Chatbase provides insights to understand your users by tracking how they behave and what works (or not) for them. This is especially helpful when you want to target a specific audience and you want to improve your messaging and promotions according to specific inputs from the analytics tool.

When it comes to building chatbots, including analytics in the strategy is often sidelined. It’s considered an additional responsibility, something that can be easily avoided. However, measuring the performance metrics of a chatbot must be included in the development strategy because it’s the only way to define if your chatbot is working as you imagined it to be.

I hope you learn to integrate these tools and use analytics to enhance the experience of the chatbot for your end-user. In case you begin to feel that it’s a sponsored post, let me tell you it’s not. All these recommendations are personal and I have learned through trial and error. I hope you find the best tool suited to your needs.

Making Web Accessible

Web should be accessible to a vast majority of people including those with different kind of disabilities. It is not only about those who can’t see or can’t hear or any other specific category of disability. We can make positive impact on the lives of people by making web accessible to them.

Primarily there are 4 main types of disabilities that highly affect the use of web.

How to Incorporate Accessibility in Your Website

1. Vision

People with low vision or those who are completely blind mostly rely on using the screen readers and keyboard. Specially designed keyboards are available in the market which blind users can easily use. In earlier days people with vision impairment had to use external bulky screen readers attached to their computers but these days browser extension like Chromevox and Fangs are available.

Websites should be designed and coded in a way that these should be easily recognizable for the screen readers. For example: putting appropriate alt tags in images help screen readers to read the image loud to blind users so that they get to know what that image is all about.

Also, there are huge number of people in the world who are color blind. This term may be confusing for some people. It doesn’t mean that the person is blind or can not see anything. Color blind people can see the colors but they see them differently. Green and red are the highly affected colors.

As per the survey results, 8% of men and 0.5% of women are color blind. You may wonder why this huge gender based difference. The reason why men are highly affected than woman by color blindness is: X-Chromosomes. These X-Chromosomes are responsible for sending color signals to the human brain. Men are born with one X-Chromosome whereas women are privileged to be born with two X-chromosomes and in case one is defective then the other one comes handy for women. Nature has offered extra privileges to women. :D.

Some of the famous celebrities to name with color blindness are- Mark Zuckerberg, Bill Clinton, Keanu Reeves, Prince William Windsor.

There are many ways in which we can make web accessible for color blind people. For example: include color names and show example, please see the image “Color Names

Don’t rely on color coding only, instead try to use a combination of color texture or pattern. Please see the image “Colors and Patterns”.

You can also proof to color blindness in Photoshop and Illustrator while designing. Please see the image “Color Proof”.

Web Accessibility: By making your website accessible, you automatically increase the target audience. - DEV Community

2. Hearing

Making web accessible for deaf and hearing impaired people is relatively easy. The best solution at the moment is the use of closed captioning whenever a sound appears. This technique is widely used in television where a text is displayed whenever a sound appears.

Use of signs and symbols is also a very useful technique for this category of people. Captioning the videos on web pages also ensures that search engine will more accurately index them leading to more people finding your content. There are certain tools that can help create captioning to our videos like Overstream.net that allows to caption videos hosted on other sites like YouTube.

3. Motor

The requirement for motor impaired web users is generally overlooked or poorly implemented. The main reason for motor impairment is stroke, Parkinson’s Disease, a broken arm/wrist/palm. To help this category of people we should always ensure to increase the width and height of the clickable area. This can greatly help the motor impaired people who can use the mouse but with limited mobility.

Some of the other easier ways are to include images for text links. Clicking images is far more easier than to click text links. Assign CSS command display:block to each link in the vertical list. This way full width is clickable instead of just the link. Use of padding on left and right of the text links can also increase the clickable area. Assigning a background color to focused links is also a very useful technique we can do to help the keyboard-only user tabbing through the web.

4. Cognitive

This type covers the difficulty with understanding, inability to focus and distractibility. We should follow universal design principles to make websites accessible to individuals with cognitive disabilities therefore making it more accessible to everyone. Mainly there are 3 principles that come handy to design the web for cognitive disabled people as explained below:

  1. Content of the website should be simple. We should refrain from using complicated language, technical terms, legal jargon, and professional buzzwords. If it is necessary to display complex information we must use a glossary of sections targeting different people.
  2. Placement, styling and consistency of navigation links. We should make sure all the navigation links are at the same location and are not scattered on different places. It becomes very uneasy for cognitively impaired people to try to locate what they are looking for.
  3. Using illustrations, icons and other visual cues to communicate the key idea. Images can be very effective in communicating the complex information otherwise this information may be lost in the middle of a long in-depth content.

Making Web Accessible for All | Humble Bits

There are also impairments that are directly not associated with the users. Environmental factors also have huge effect on how people use and interact with the web. Some of them are mentioned below:

  • Low bandwidth, intermittent internet connection
  • Bright light, rain or other weather conditions
  • Noisy environments
  • Only option to browse the web on mobile devices

There are different legal acts in effect in different countries to give equality right to disabled people and help them use the web without discrimination. Section 508 requires US federal agencies to ensure that employees and members of public with disabilities should have equal opportunity to access government information.

Target.com: In February 2006 a student of University of California-Berkley, Bruce Sexton in conjunction with “National Federation for Blind” sued Target.com because it’s website was inaccessible for the blind. This lawsuit was used as a spotlight to many corporate websites that don’t play well. Target.com had to settle the case with $6 million.

Key to better communication skills: READING

One evidence of a flatter world today is the rise of geographically distributed teams. This isn’t something new, distributed teams have been around since ages and have given us a lot of Open Source software. Imagine not having Linux, Firefox, Apache, VLC, … ad infinitum.Distributed teams have also aided the software outsourcing industry to prosper.However, today even companies who do not outsource their work have their team members distributed across the globe.

So, what do you think is the number one skill required to work in a distributed team?

9 Effective Communication Skills

Effective communication.

Effective communication requires us to have a good hold on the various modes of communication – Reading, Writing, Listening and Speaking.

And I believe if we read more, we can improve our writing, listening and even speaking.

I’m sure all of us do a lot of work-related reading. However, I find that reading books not directly related to our work is also required.

Apart from just vocabulary and grammar, reading books on various topics improves one’s general knowledge, imagination, and creativity among other things. And these benefits can also help bridge gaps in distributed teams, between team members from different countries.

Getting into the habit of reading is not easy; given how we are always catching up with our fast-paced and hectic lives.

However, I believe that like any habit, the habit of reading books can be picked up with just a little bit of effort. By the way, to understand more about habits, please read – The Power of Habit by Charles Duhigg.

As per Charles Duhigg, more than 80% of what we do in a day is driven by habit, which means that most of the times we are on auto-pilot, except when we are exerting ourselves mentally or physically in order to pick up a new habit.

Really, an interesting book, I highly recommended it!

Enough meandering, let’s see how we can read more.

How to start reading more?

How to Perform a Close Reading: Elementary School - Learning Essentials

One of the ways to build a habit of reading books is to set aside some time in your day. It could be anything as per your convenience – 20 mins, 30 mins, or 1 hour.

I recommend scheduling it in your calendar so that it’s harder to skip it.

Remember, you need to make reading a daily habit.

What kind of books should I read?

Find a book on a topic that interests you. It could be fiction or nonfiction. I would recommend reading both. There are many writing genres, pick any.

What if I find the book boring?

Google says there are an estimated 145 million books in the world today. So if you are not enjoying a book, even after reading forty – fifty pages, leave it and move to another book.

And if you’re enjoying it, stick with it to the end.

Blogs vs Books?

ARE BLOGS BETTER THAN BOOKS? | Sanstonz

Blogs are great, some blogs are just awesome. However, usually, blogs are about a specific topic, whereas books usually contain various related topics.

Blogs are typically written by one person, whereas a book usually has a team behind it. Apart from the author, there are reviewers, editors, people who want to make sure that the book should be good enough to sell so that it can make money.

How to find good books?

  1. Hunt for bestselling books under various topics on Amazon or GoodReads
  2. Ask friends, family, and colleagues

Fluid spaces in design organisations

Back in 2010, when we were a handful of designers working in an apartment, there was just one spare wall where we had mounted a huge whiteboard and named it “The divine wall of ideas”. Whenever we were stuck, we thronged to that wall and drained all our shitty thoughts. And after hours of brainstorming, it would bless us with some great ideas.As our team grew, more designers joined our team. With more people in our tribe, our hearts grew but our rooms shrank. Our “divine wall of ideas” was no more divine. When all of us were together, we felt like chickens in a coop. Everyone blocked each other’s view and we heard frequent elbow-knocks and sounds of ouch and oops when someone tried to reach the wall.Why it's important to have fluid spaces in a design organization | by Quovantis | UX Planet

We began to realize that limited space was causing hindrance to our creativity and lowering our productivity. We wanted everyone to participate in our design thinking sessions, wanted them to see user personas, snapshots of the existing UI, and sketches of proposed solutions so that they could critique it. But we realized that our paraphernalia needs physical space. One can’t just do all of this effectively without any board to draw/sketch and without any space for people to sit/stand.

And this isn’t some fancy thought that we made up ourselves. It’s backed by research and many design leaders agree that fluid design spaces improve creativity. Scott Witthoft, author of Make Space: How to Set the Stage for Creative Collaboration shared in an interview with HBR–

“When you’re generating ideas, it becomes really important to be very fluid and have the ability to move in and out of different concepts and different people’s voices as an idea’s coming to fruition. So creating a space that allows movement, allows active posture to really help collaboration move more smoothly, and can forward creativity by allowing people to participate when they want, step out when they don’t, and allow leadership to move throughout the group.”

So, we did something big. We moved our entire office to a bigger, better place. Well, there were other reasons too which aided our decision. But, you could say that it was mainly because we realized that we can’t trade our happiness with anything. If people aren’t happy with their workplace, then they’re probably dragging their feet to work. We couldn’t bear that thought!

It’s been almost a year now that we’re in our ‘new’ office. We used this opportunity to rethink how we wanted to make the best use of the available space. We have made conscious choices in making design thinking sessions more productive and interactive. Most of it was inspired by companies like Apple who have made commendable efforts in popularizing the idea of such fluid spaces to espouse creativity. We owe it to them.

So, let me take you around our office then-

Elevated tables and chairs

Collaborative & Social Space Design After COVID-19 | Steelcase

This is my favorite spot. It especially works during mid-day design sessions when people are caught up with deadlines and it’s hard to get their attention. The high-tables, as we call them, allow them to take a break and stand together close in the upright position. It’s a space where people can get comfortable, but not too much.

You can spread your ideas, sketches or prototypes on the table and open the discussion for everyone. When you have this setting, it makes people aware that you are open to critique and they feel more inclined to share their honest feedback.

Also, these tables are located at places where people have high chances to bump into each other while walking around. So, imagine you’re sitting at the high table, working on some design and a fellow designer walks past you carrying her coffee mug. She stops by and appreciates the color gradient you’ve used, asks you to teach her how good gradients are made and also tips you on two new Sketch shortcuts to speed up your execution. Isn’t that a great conversation?

Whiteboards and Glassboards

Glass Whiteboards and Glass Dry Erase Boards by Clarus | Whiteboard wall, Glass dry erase, Glass dry erase board

At Quovantis, we value simplicity in the processes that can help us get our ideas out quickly. So despite all the digital tools that are out there, we still are a huge fan of whiteboards and glass boards where we can draw, doodle, write and paste Post-its quickly- a fast and efficient way to communicate.

So when an idea bubble appears, we quickly gather on the nearest wall and put it up for people to see and critique. And then we let it stay there so that everyone can see it, reference it, and can go back and share their thoughts on the pile. The visibility and accessibility are very important in every design session.

Meeting rooms

Our meeting rooms are a manifestation of the fantasy world we admire. They were named after voting democratically within the organization. One wall of each meeting room has the famous quote of that fictional hero/place. For instance, Diagon Alley and Shire have quotes about Hogwarts and the mystical land of Narnia.

From the design point of view, we’ve kept the visibility of meeting rooms neither too protective nor too revealing. It’s such that people who are inside the room don’t get distracted by what’s going outside. And, people who are outside can steal a glance and get to know if the meeting room is available or occupied. Such visual cues help people in overcoming mental blocks to rush into a room and start a discussion.

Abundant open space

We all have this natural tendency to crumble to negativity when things don’t go as we plan. And that’s why we have tried to keep the office interior spacious, happy and uplifting. The empty space allows us to make use of what Scott refers to as “impromptu pop-up team spaces”

There is one corner near the bookshelf and plenty of space near the couch to sit and have a discussion if one is bored with their sitting space. One can even walk around with some hilarious quotes and illustrations around. I remember, one of our teammates, told me about how he found creative inspiration in the office cafeteria.

Pro Growth Hacking Strategies for Startups

In A Small Group, - Icon Meeting Png , Free Transparent Clipart - ClipartKey

So as to scale a business, it’s indispensable to advertise the products viably. There are numerous difficulties along the path; in any case, adaptability is conceivable with these best development hacking methodologies.

To connect with an enormous crowd, companies need to embrace distinctive development hacking procedures. Although some among these procedures have just been around for a couple of years, in any case, they demonstrate to assume a crucial job in the growth of cutting edge organisations. Numerous business visionaries have made them a necessary piece of scaling their business since they saw productive outcomes, and it’s about time you do so as well.

Entrepreneurs look for different growth hacks and need to develop rapidly by collecting as many clients as possible to expand their income. Growth Hacking has been proven as a practical and trusted approach for a sure shot success of budding startups. Yet, only a few businesses are able to execute these growth hacks in an ideal manner. This article gives you an insight into the 12 best growth hacking strategies which have been proven successful for various ventures. Let’s take a look:

1. A/B Testing

Multiple Hypothesis Testing/Comparisons Problem: How Adding More Variations To Your AB Test Will Impact Your Results?


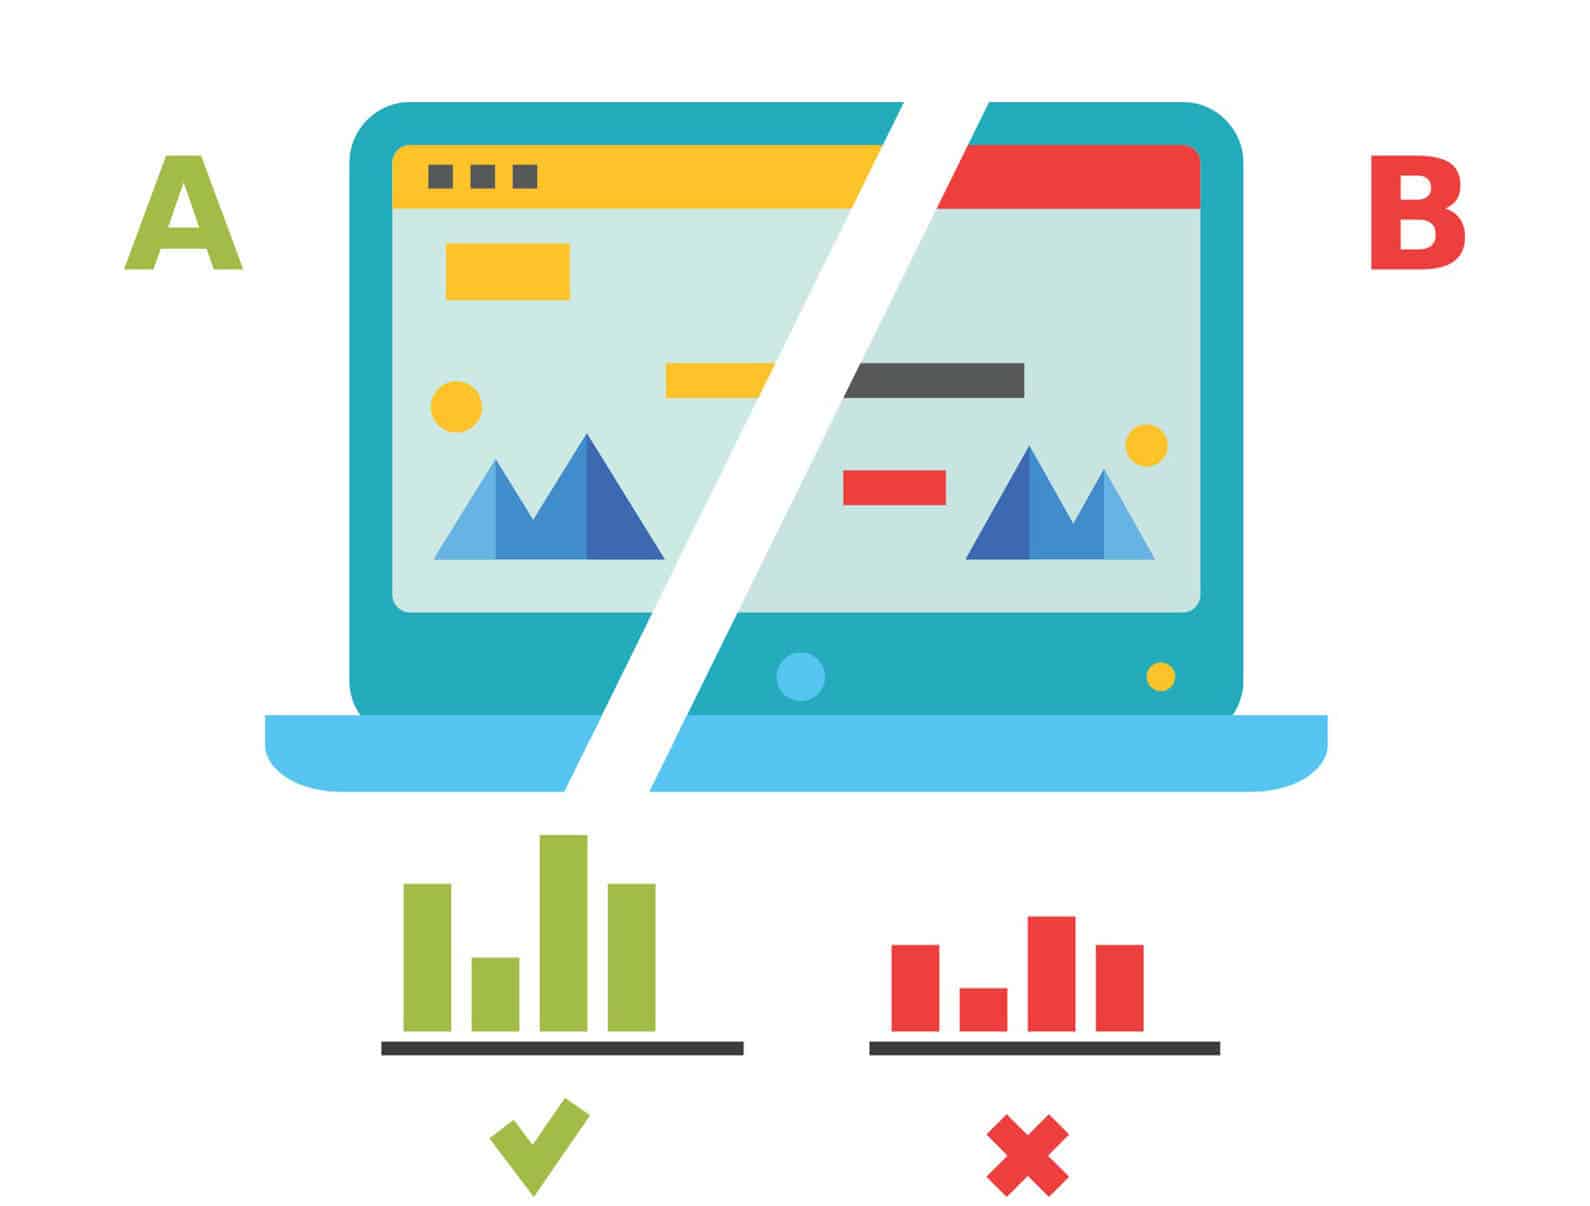
A/B Testing draws its way wherever there is traffic. No matter what it is; a blog title, email headline, popup CTA, or a million different things. There’s an A/B test that can assist you with streamlining that crusade. Regardless of whether it’s A/B testing your landing page content or seeing which email headlines resound with perusers, experimentation can reveal handy solutions that lead to tremendous outcomes.

2. Add hidden form fields to your lead-generation forms

Defining & Understanding Hidden Form Fields Plus the 5 Main Benefits

The more you think about your leads, the better you can cater and support them in your promoting down the line. One technique used to catch much more data about your leads is to pass a parameter in a URL which can be acknowledged by a hidden field on one of your forms. Utilising this technique, you can catch much more data about your leads without frustrating them out with various forms that you as of now gathering data from. Regular employments of this can incorporate area, crusade, and intrigue classification.

3. Conduct Giveaways

Running next level Facebook giveaways with Recart

Free giveaways can be a significant approach to promote your business. By showcasing your product to customers, you can rapidly and effectively create familiarity with your image, and it may spur them to return for more. The second time a client appears, their buy won’t be free. A giveaway is much similar to other advertising activities – it’s a method to create more exposure for your merchandise and ventures. Like it or not, all promoting costs money. Regardless of whether it’s an announcement on the interstate or a flag promotion on a site, you should be ready to spend on the off chance that you need to draw attention to your brand. In view of that, a giveaway can really be a less expensive approach to promote than other marketing strategies.

4. Create a referral program

Premium Vector | Illustration referral marketing

Referral advertising permits your users to turn into your organisation’s pioneers by referring your business to their loved ones. While referral advertising requires marketing endeavours and the motivation of remunerations to get users to participate, there are numerous advantages of referral programs, and you ought to undoubtedly be utilising this technique to grow your audience base.

5. Go Freemium

How to Translate Freemium to Any Business Model

In the event that you own an application or software business, you should seriously mull over building up a freemium model. This works incredible for applications of numerous sorts. Offer something for nothing. It probably won’t do a lot; however, it’ll give people a taste of your product. When they see that they can profit by your product, they’ll need a greater amount of it. A few people will never change over into paid clients. However, you need to concentrate on the onboarding procedure. It’s simpler to hold clients than to acquire them. That is the reason the freemium model works so well. You, as of now, have leads on the line. You simply need to persuade them that they need the paid adaptation of your product.

6. Guest Posting

The Complete Guide To Guest Posting (2019) - WebKu

Guest Posting administrations help to create new links. There are various guest posting services accessible on the web. Practically each one of them has their own sites going. These specialist organisations make it simpler to get abundant natural leads through the content by giving a connect to your site, which eventually helps in boosting up your SERP rankings. Visitor/Guest blogging is an incredible growth development hack which bloggers will in general use to increase natural site traffic and connecting with various crowds by improving their SEO rankings.

7. Collaborate with other brands

Five Tips For Collaborating With Other Brands

Talking about the customer base, brand collaborations are the uncelebrated protagonists of the growth hacking world. In the event that you have a user base of around 100,000 individuals and another brand in the related field has about 80,000 users, you can cooperate to contact 180,000 customers. You’re not searching for an immediate contender. Rather, center around finding a business that supplements your own. For example, possibly you sell handcrafted soaps. You could join forces with a business that sells body scrubs or shampoos. Contact forthcoming accomplices with an email or call. Come prepared with thoughts for approaches to mixing your users in natural manners, for example, by tagging each other via Instagram or Facebook, offering product packages that consolidate your products, or in any event, something as simple as cross-posting on each others’ websites.

8. Host and Attend Events

BigMarker

A genuine Growth Hacker doesn’t dispose of any potential roads that may lead them towards an objective. This incorporates going offline to energise development. On the off chance that you have niche-related events in your vicinity — or even away — think about visiting. You can go as a visitor or save a corner for your business. Meeting individuals up close and personal, shaking their hands, and getting some information about their needs can make you a more alluring arrangement than a nondescript organisation. Proceed, gain from the best, create associations, find out about your industry, and get some motivation. You don’t have anything to lose. Uncovering your business on pertinent business occasions and meetings will permit you to make connections with minimum exertion.

9. Start a Blog

Blog SEO Tips - Pierre Zarokian

Clients can’t cherish you on the off chance that they can’t discover you. If you haven’t started with a blog yet, get started with it ASAP! Blogging is one of the most economical, least complicated approaches to get before a group of people and connect with influencers. The present shopper goes directly to the Internet for information before beginning the purchasing procedure before they ever think about conversing with a human. Don’t dispatch an excellent blog with half a month’s worths of awesome content and afterwards disregard to compose another word.

10. Use Urgency and FOMO

8 Best FOMO Marketing Examples to Boost Your Conversions

Urgency and FOMO which is the abbreviation for the “Fear Of Missing Out” are two great psychological tools for amplifying your growth. FOMO exploits an individuals’ mental idea of not being deprived of something great. What’s more, it’s a conceivable piece of the reasons why utilising an invite-only framework for your organisation or new element discharges is so successful.

Identified with that is Urgency, which is likewise attached to human brain science. Essentially, we feel constrained to act if a circumstance is dire. So in case you’re opening beta access to your new help temporarily, it turns out to be all the more engaging potential clients. Rolling out offers like a limited-time deal or rapidly expiring discounts make people want to act fast and shop thinking they might miss a great deal. Utilise Email Marketing:

11. Hire a growth hacker

How to Hire a Growth Hacker That Will Actually Get the Job Done

This is by far the best and one of the most straightforward growth hacking strategy: Hire a Growth Hacker. A growth hacker knows exactly what techniques to utilise to take your company to the top. Employing a professional implies you’ll get somebody proficient at showcasing your organisation as well as deciphering the information that outcomes from those endeavours. Regardless of whether you have an advertising plan set up, you could profit by employing a growth hacker.

CONCLUSION

Growth Hacking is, in any case, more effective than traditional marketing. In today’s cut-throat competition, Growth hacking is the only way through which a new business can ride on the high tide and grow exponentially. Revolve all your strategies around taking care of issues, developing your audience and improving your image. Incredible products and services positively help sell themselves; however, you have to get that growth plan in motion. Enlist client evangelists, join forces with similar organisations, make content with wild relinquish, set yourself apart with world-class client assistance. With such vast numbers of basic approaches to dispatch growth, there has never been a more energising time to perceive what your business can genuinely do.

The Good Developer

There are various parameters to judge a developer but for me the number one criteria is efficiency. Ahem…I don’t mean efficiency of writing bad code or providing sub optimal solutions. Far from it.I mean the efficiency to write good code. Readable Code. Extremely Flexible Code. A highly maintainable code.It’s the efficiency with which they passionately latch on problems and solve them. They are efficient because they understand the underpinnings of the programming framework and the toolset they use every day. So, how does one become efficient at developing software or be “The Good Developer”?

What Makes a Good Developer? A Manager's POV. | by Distillery Tech | Medium

I’m not sure if you loved Physics or if you ever understood Einstein’s famous mass-energy equivalence. Well, the one where he proved that mass of a body is a measure of its energy and they are connected by a constant.

E

    • =

mc2

I hope Einstein forgives me for this. But, in our little software development world, it means

E

    • = Efficiency

m

    • = (intrinsically) motivated

c

    = Cluefulness

Thus, efficiency of a developer can be defined as their level of motivation to excel times the square of their cluefulness.

True. Seriously. Don’t believe me? Ask Einstein. Can you? You can’t, can you? Then, you really have to trust me on it ?

What is Cluefulness? It can be defined as one’s expertise and capabilities in developing software. Please read this extremely insightful post by Eric Sink if you want to learn about Cluefulness and how to increase it.

If you one of the developers who are extrinsically motivated by rewards, all-the-things-money-can-buy-kind-of-salary, free beer to write code – tough luck in this life. On the other hand, if you are intrinsically motivated to learn new frameworks, delve into complexities of algorithms and data structures, write code for fun then all you have to worry about it is how to increase your cluefulness.

I won’t repeat what Eric mentioned in his great post but I would mention few things to increase your cluefulness.

Read Code – It’s surprising how less time developers really spend reading other people’s code for learning patterns and anti-patterns. Some developers would keep on writing the code in same style that they learned in school. For real. One can either learn by working with really good developers or reading code of open source frameworks/products. I can’t emphasize enough the value of reading code – Can one become really good writer if they haven’t ever read a good book in their life?

Focus – How can one become good at their art if the first thing they were to do every morning was check their friend stream on Facebook, chat with their long lost friends on their favorite IM, check their emails, any-other-unproductive-activity-except-programming. Shouldn’t the first thing really be to focus on building great software? I doubt if Einstein would have come up with general theory of relativity if he was checking his friend feed on facebook all the time or was being bugged by other Physicists on Skype.

The Best Software Development Tools Of 2021

Be Inquisitive – One has to be curious and hungry to learn new things, ruminate on hard problems, figure out ways of doing old things in a new way. One would never learn better ways of doing things if one is happy with the status quo.

Tools are your best friend – I’m not sure if a developer could really be productive in writing ASP.NET applications using Notepad. One has to be good at Visual Studio.NET or an equivalent IDE to be really productive at building websites using the ASP.NET framework. Thus, it’s not only enough that one spends the time in learning and polishing their programming skills but also picking up tricks to use the development environment to their advantage. Learn the Shortcuts, write loads of reusable code snippets, know how to use Nuget etc. They are an aide to being efficient and solving problems faster.

Angular JS: Custom Directives

This blog’s main purpose is to ease the understanding of the $scope in the custom directives. While creating custom directives we have to apply different types of functionalities, so for that we must know about the $scope behavior in the directives.$scope has a very important role in AngularJS, it works as a mediator (or like a glue) between the logic & view in an Angular application. Now if we talk about the custom directives, then first question which arises is-“Why do we need custom directives?

The answer is-

“In any application if we want some specific functionality and we want to reuse that in whole application module, then for this we need to develop a set of code. Angular calls it directives.”

Custom Angular directives

I am not going to discuss so much about custom directives basics here. In this blog I am just focusing on use of $scope into directives.

So, when we create a custom directive it has a default scope, which is the parent scope (the controller’s scope from where the directive is called). This behavior is by default, until and unless we do not set the scope.

As we know that whenever we define a directive, there is a “directive definition object” (DDO), in which we set some parameters like- restrict, template, require, scope etc.

In this blog I will talk about the scope properties, they are  false, true, {}.

Let’s discuss them one by one.

Angular JS Dhananjay Kumar debugmode Microsoft MVP http

Scope : false (Shared Scope)

In layman language false is assumed as no, so if the scope is set to false, then it means use parent scope in the directive and do not create a new scope for the directive itself. It just uses the scope of respective controller. So let us suppose if we have a controller named “homeController” and a directive “printName”, then in printName directive we will get parent scope by default and any change in scope values, either child or parent, will reflect in both.

Scope : true (Inherited Scope)

Using this property, the directive will create a new scope for itself. And inherit it from parent scope. If we do any changes to the controller scope it will reflect on directive scope, but it won’t work the other way around. This is because both of them use their own copies of scope object.

Scope : {} (Isolated Scope)

One of the important features, its called isolated scope. Here too the directive will create a new scope object but it is not inherited by the parent scope, so now this scope doesn’t know anything about the parent scope.

But the question arises, if we do not have the link from parent scope then how can we get the values from it, and how can we modify it ?

The answer is- set the objects property into DDO, but for this it is necessary to set on attributes into the directive.

In isolated scope we use three prefixes which helps to bind the property or methods from the controller (parent scope) to directive (isolated scope). Lets understand how this works.

Whenever a directive finds any prefixes in its scope property in DDO, it checks it in directive declaration (in html page where the directive is called) with attribute declared on this element. We can also change the name by giving a separate attribute name after any of the prefixes.

These are @, =, &

‘@’ : One way binding

One way binding means a parent sending anything to the directive scope through the attribute, gets reflected in the directive. But if any change in the directive happens it will not reflect in parent. The @ is used to pass string values.

‘=’ : Two way binding

This is called two way binding, because the parent scope will also reflect to directive scope vice-versa.

It is used for passing object to the directive instead of string. This object could be changed from both sides, from parent or from directive. That is why it is called two-way.

‘&’ : Method binding

Used to bind any parent’s method to directive scope. Whenever we want to call the parent methods from the directive we can use this. It is used to call external (outside of current scope) functions. Overall “&” is used to pass data as a function or method.

In this example the directive creates a property inside its local scope, that is swapData. We can also understand swap as an alias for swapData. So we pass a method to ‘&’ which is then invoked by the directive whenever required.

Summarizing, Shared scope (sharing the same scope and data, can not pass the data explicitly), Inherited scope (parent scope values can be fetched into child but child means directive scope will not effect parent), Isolated scope (both controller & directive do not share the scope & data, we can explicitly pass the data using some parameters that is @, & ,= ).

ExoPlayer and UI customization

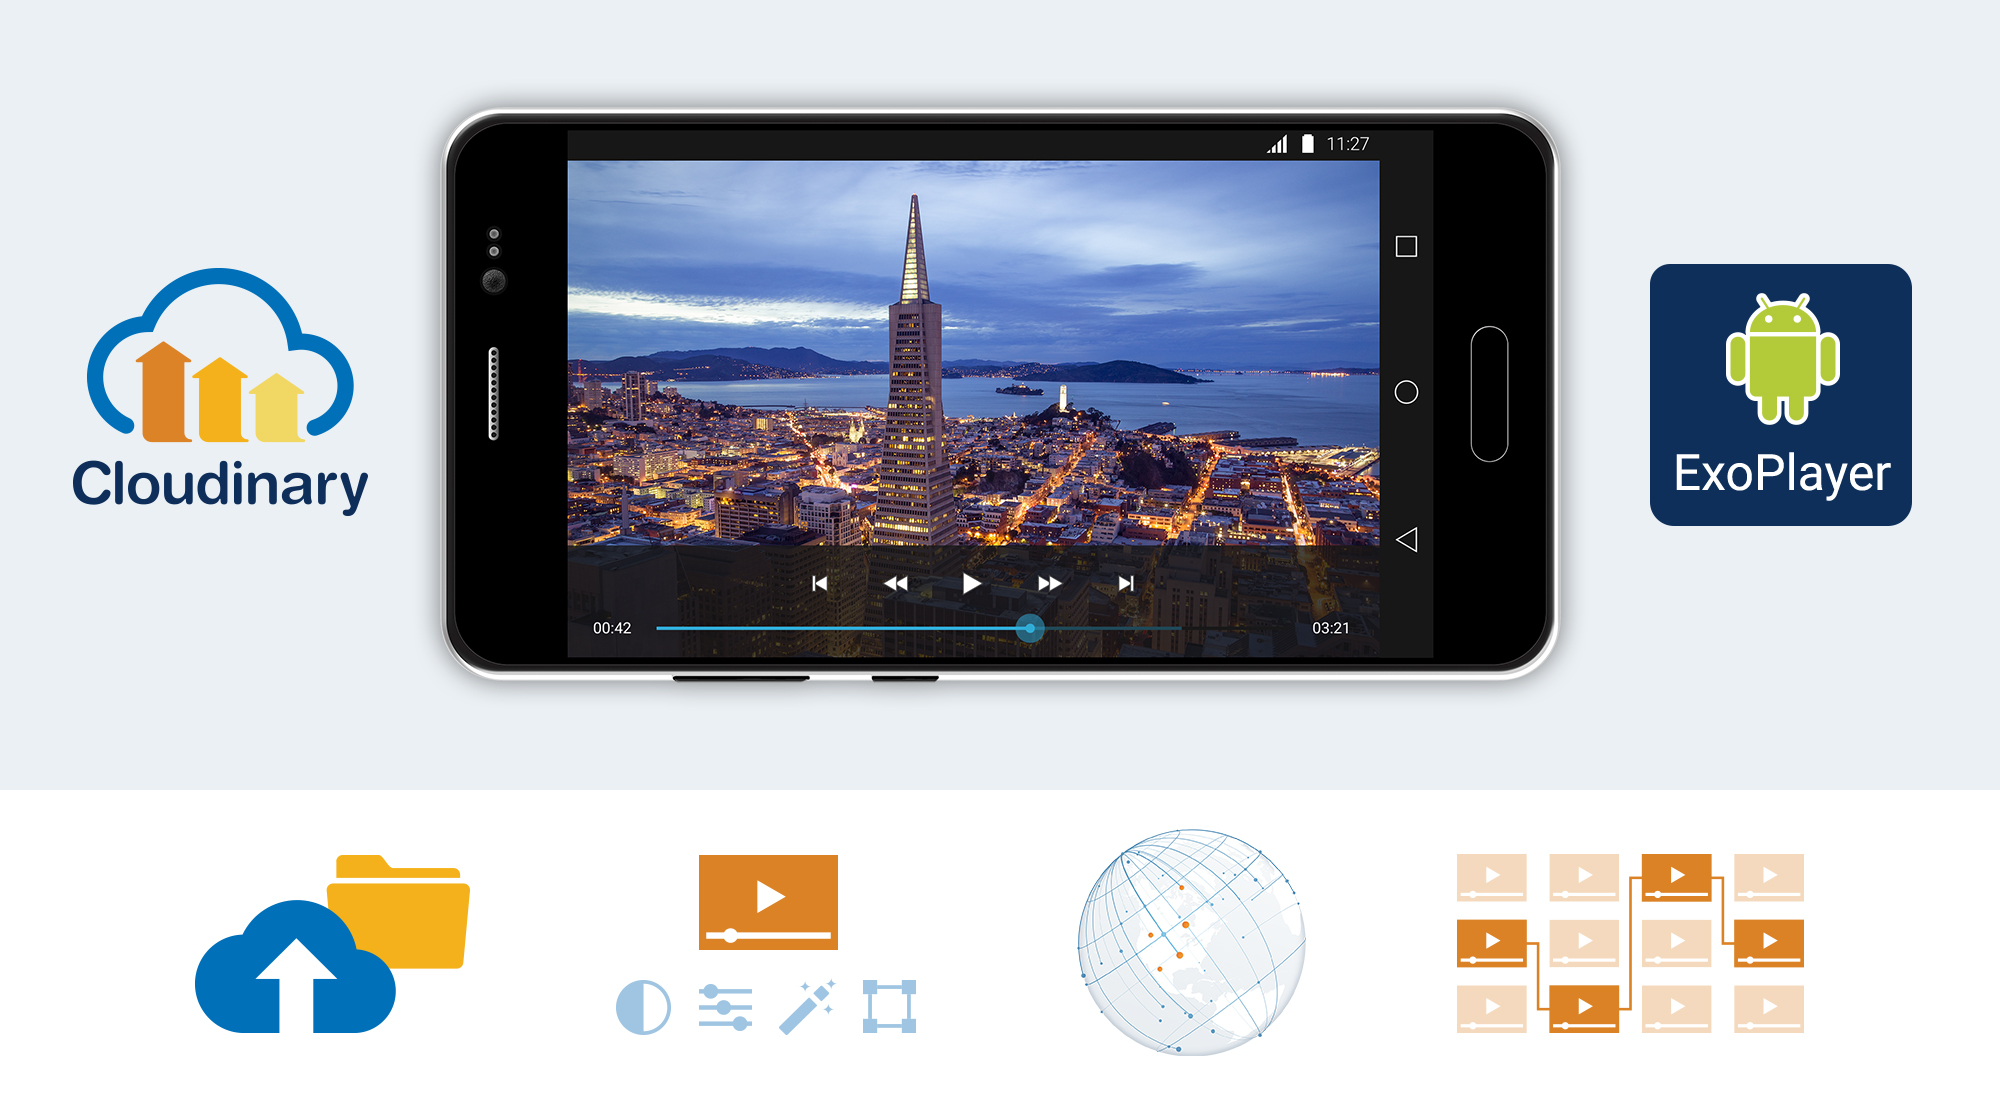
In this blog, we will learn how to detect different events of ExoPlayer and how to customize its UI components. The feature to customize the ExoPlayer UI components is available from V2.1.0 onwards.ExoPlayer events and UI customizations | Humble BitsSo let’s start with ExoPlayer events first:

Events

  • ExoPlayer.EventListener: This event listener gets called when there are any changes in player state. For example, this listener will get called if we change the seek position of the player or if we change the current playing track. There are several callbacks related to this event listener:
    • onTimelineChange(): called when the duration of the source has been determined.
    • onTrackChange():  called when the source track has changed.
    • onPlayerError(): called when some error occurs in playing the source file.
    • onPlayerStateChange(): called when the player state changes from one to another. The possible player states are idle, ready, buffering, paused, playing, stopped, completed, error, etc.
    • onLoadingChange(): called when the source starts or stops loading.
    • onPositionDiscontinuty(): called when the source seeks to some position.
    • onPlaybackParameterChange(): called when the current source parameter gets changed.

ExoPlayer Android Tutorial: Easy Video Delivery and Editing

So if you want to perform any operation or any customization during any of these events, then you can implement this listener. To start getting callbacks for any of the events mentioned above, you can set the ExoPlayer.EventListener to your player object using the addListener() method of the SimpleExoPlayer class.

  • AudioRendererEventListener: This listener can be used to listen to events related to audio rendering. For example, this listener will get called if the audio format gets changed or if the audio decoder gets initialized. Below are the available callback methods of the AudioRendererEventListener:
    • onAudioSessionId(): called when the first audio frame gets rendered and a random integer id is assigned to the audio stream.
    • onAudioDecoderInitialized(): called when the audio decoder gets initialized and the audio is ready to play.
    • onAudioTrackUnderrun(): called when the audio track gets cut down because of any reason by the ExoPlayer.
    • onAudioInputFormatChanged(): called when the audio format gets changed from one to another.
    • onAudioEnabled(): called when the audio track is enabled by the track selector.
    • onAudioDisabled(): called when the audio track is disabled by the track selector.

To start getting callback events for any of the above-mentioned methods, you can implement the AudioRendererEventListener. You can set this listener to the ExoPlayer object by using the setAudioDebugListener() method of the SimpleExoPlayer class.

  • VideoRendererEventListener: This listener can be used to listen to events related to video rendering. For example, this listener gets called when the first video frame is rendered on the screen or if a video frame gets dropped because of any reason. Below is the list of available callbacks of VideoRendererEventListener:
    • onDroppedFrame(): called when any video frame gets dropped by a player because of any reason. It will also give you the count and duration in milliseconds for the dropped frame.
    • onVideoSizeChanged(): called when the size (resolution) of the video gets changed.
    • onVideoInputFormatChnaged(): called when the source file format changes from one format to another.
    • onVideoEnabled: called when the video track is enabled using a track selector.
    • onRenderedFirstFrame(): called when the first frame of the video track gets rendered.
    • onVideoDecoderInitialized(): called when the video decoder gets initialized and the video is ready to play.
    • onVideoDisabled(): called when video track is disabled using a track selector.

To start getting callbacks for the above-mentioned events, you can implement the VideoRendererEventListener. You can set this listener to the ExoPlayer object using the setVideoDebugListener() method of the SimpleExoPlayer class.

Use of these events is optional. You are free to set the listeners if you need the callbacks. For example, if you want to perform any action when the video size gets changed then you can set the VideoRendererEventListener on SimpleExoPlayer via setVideoDebugListener() or if you want to perform any action when the audio decoder is initialized, you can set the AudioRendererEventListener on SimpleExoPlayer via setAudioDebugListener().

Now, let’s look at the ExoPlayer UI components.

UI Components

UI Components designs, themes, templates and downloadable graphic elements on Dribbble

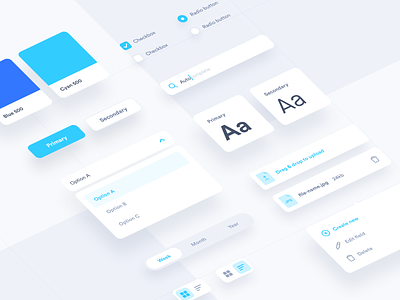
  • PlaybackControlView: It is a view for controlling and managing different actions on the ExoPlayer instance. PlaybackControlView displays standard controls like play/pause, seekbar (for displaying the total duration and current duration), fast-forward and rewind.
  • SimpleExoPlayerView: It is a high-level view for ExoPlayer to display video, subtitle, and other standard player controllers.

Use of these UI Components is also optional. Developers are free to customize the complete view by implementing their UI components from scratch as well if they want. ExoPlayer has provided the privilege for full customization of UI components. These UI components can be customized in three different ways.

  • By setting attributes (or calling corresponding methods) on the views.
  • By globally overriding the view layout files.
  • By specifying a custom layout file for a single view instance.

Full documentation of these three different ways to customize the attributes is available on the official website of ExoPlayer JavaDoc of PlaybackControllView & SimpleExoPlayerView.

5 attributes are used to customize the ExoPlayer UI.

  1. use_controller: If you want to display the playback controller, set it to true else false.
  2. show_timeout: Input can be any long value which accepts the value in milliseconds. This is the controller view timeout.
  3. fastforward_increment: Input can be any long value which accepts the value in milliseconds. This is used to skip the video playback position forward with the input value. The default value is 15 sec.
  4. rewind_increment: Input can be any long value which accepts the value in milliseconds. This is used for moving playback position backward with the input value. The default value is 5 sec.
  5. controller_layout_id: If a developer wants to make the design of controller by themselves then they can design any layout XML file and can pass it to controller_layout_id.

That’s all for this blog. This blog was all about the different types of events and how to customize some basic UI components of ExoPlayer.

Windows 8 paired with Ubuntu 12.10: DUAL BOOT

I started with Ubuntu installation on Windows 8 and little did I know that it will have its own new complications. Lets try to understand!http://www.ubuntu.com/Since I had Windows pre-installed, the obvious suggestion to use ‘WUBI.exe’ was thrown at me. I went to the Ubuntu site to download the installer and got the Ubuntu 12.04 set up from the team. All I had to do was to let WUBI handle the installation and it would have been done but, it failed.

Dual-boot Windows 8 and Ubuntu 12.10 in UEFI mode | LinuxBSDos.com

My second attempt.

I made the USB installer from 12.04 Ubuntu setup. First, I had to download the USB installer and later insert the pen drive. Second, I had to run the installer and let it handle the rest. After you get the USB installer prepared one has to boot the system from the USB and for that one has to reach the BIOS set up first. Another interesting point, ‘do you know how to reach the BIOS setup on windows 8?’. Windows 8 works on UEFI technology and thus gives you a span of only “.2” seconds to hit the Del/F2 button bang on at the right time. Try to give it as a challenge to someone and you can bet 1000000$ bucks on it cause he will not get that done in his lifetime! Right!

http://www.ubuntu.com/download/help/create-a-usb-stick-on-windows

Another option is to go to the Windows setting from the start menu and to reach the General option. There the smart Windows 8 will ask you whether you want to boot again using other source like USB/DVD/CD. So, that will work if you have a USB/DVD/CD connected to the system. Remember only one! But the USB installer also didn’t work cause of what I later found out is the Windows 8’s UEFI feature.

UEFI stands for “Unified Extensible Firmware Interface”. The UEFI specification defines a new model for the interface between personal-computer operating systems and platform firmware. The interface consists of data tables that contain platform-related information, plus boot and run time service calls that are available to the operating system and its loader. Together, these provide a standard environment for booting an operating system and running pre-boot applications. UEFI would not support any OS without the UEFI feature so I had to do what I did next.

Got the Ubuntu 12.10 version and after a good hour and some minutes of my precious Ubuntu download I again made the USB installer. Do you want to know why I didn’t choose the WUBI.exe option? Well, when using WUBI.exe, I was given a choice from 3 GB to 30 GB for the Ubuntu storage, to which my team member informed would be insufficient. Like anybody in a similar situation, I too went with the ‘Boot using USB’ option but to my horror even this didn’t work.Hmmm!

http://releases.ubuntu.com/quantal/

New Mantra – “Disable Secure Boot”

After disabling the Secure Boot option in Windows 8, I got the Ubuntu USB installer working. I rebooted my system again to find that I didn’t get the option of Windows reboot! Do not worry as I didn’t write this blog without any prior success with the Ubuntu installation ;). Ever heard of “boot-repair”. Download it from the Ubuntu link and run on Ubuntu, reboot and success! ?

https://help.ubuntu.com/community/Boot-Repair

How to use Mockito in Android

Unit testing is an important part of any product development lifecycle. The main purpose of unit testing is to test components in isolation from each other and that is how our code should be written as well. To achieve this task of writing test cases for a class in isolation from the others, there are times when we need to mock some objects or data while writing our JUnit test cases. As the name Mockito suggests, it is a framework that allows us to do just that.If the UI related part of our code is already tested by some testing framework like Espresso, then it need not be tested again. Also, we do not need to test code that relies on the Android OS. So, we can use Mockito to test our non-UI or functional code that is not dependent on the Android OS.How to use Mockito in Android | Humble Bits

By default, when we run our local unit test cases, they run against a modified version of the android.jar file which does not contain any actual code because of which, when we try to invoke any method of an Android class from our test case, we get an exception. This is done to ensure that we test only our code and do not depend on some default behavior of the Android classes. We can also change this default behavior of throwing an exception to return zero or null values. However, we should avoid this as it could cause regressions in our test cases which are hard to debug.

We can substitute Android dependencies with mock objects. We can use Mockito for this to configure our mock objects to return some specific value when they are invoked.

Mockito Integration

Mockito and JUnit Integration Using Maven Example || Mocking in Unit Tests with Mockito - YouTube

To integrate Mockito in our Android apps, we first need to include the following dependencies in our app level build.gradle file.

Once we have added the required dependencies, we will create our test class in the directory module-name/src/test/java/, and add the @RunWith(MockitoJUnitRunner.class) annotation at the beginning of this class. This annotation tells the Mockito test runner to validate if the usage of the framework is correct and it also simplifies the mock object initializations.

We have to add @Mock annotation before the field declaration of any object we want to mock.

We can use the when() and thenReturn() methods to return a value when a particular condition is met in order to stub the behavior of any dependency.

Now, let’s have a look at a sample test class. The sample below checks that the method getHelloWorldString() of the class ClassUnderTest matches a given string.

How to Mock

We have 2 methods, mock() and spy() that can be used to create mock methods or fields.

Using the mock() method, we create complete mock or fake objects. The default behavior of mock methods is to do nothing.

Using the spy() method, we just spy or stub specific methods of a real object. As we use real objects in this case, if we do not stub the method, then the actual method is called.

We generally use mock() when we need complete mock objects, and use spy() when we need partial mock objects for which we need to mock or stub only certain methods.

Mocking Behaviour

Let’s look at how we can use Mockito methods to mock behaviour of the mock or spy objects we create.

when() :
It is used to configure simple return behavior for a mock or spy object.

doReturn() :
It is used when we want to return a specific value when calling a method on a mock object. The mocked method is called in case of both mock and spy objects. doReturn() can also be used with methods that don’t return any value.

thenReturn() :
It is used when we want to return a specific value when calling a method on a mock object. The mocked method is called in case of mock objects, and real method in case of spy objects. thenReturn() always expects a return type.

Now, let’s look at the common assertions we can use to assert that some condition is true:

assertXYZ() :
A set of assertion methods.

assertEquals(Object expectedValue, Object actualValue) :
Asserts that two objects are equal.

assertTrue(boolean condition) :
Asserts that a condition is true.

assertFalse(boolean condition) :
Asserts that a condition is false.

With the combination of the above mentioned methods and assertions, we can write test cases using the Mockito mocking framework.

Advantages & Disadvantages

Let’s have a look at the advantages and disadvantages of Mockito:

Advantages

  1. We can Mock any class or interface as per our need.
  2. It supports Test Spies, not just Mocks, thus it can be used for partial mocking as well.

Disadvantages

  1. Mockito cannot test static classes. So, if you’re using Mockito, it’s recommended to change static classes to Singletons.
  2. Mockito cannot be used to test a private method.

There are a few alternative mocking libraries like PowerMockRobolectric and EasyMock available as well which can be used.

error: Content is protected !!