Angular JS: Custom Directives

This blog’s main purpose is to ease the understanding of the $scope in the custom directives. While creating custom directives we have to apply different types of functionalities, so for that we must know about the $scope behavior in the directives.$scope has a very important role in AngularJS, it works as a mediator (or like a glue) between the logic & view in an Angular application. Now if we talk about the custom directives, then first question which arises is-“Why do we need custom directives?

The answer is-

“In any application if we want some specific functionality and we want to reuse that in whole application module, then for this we need to develop a set of code. Angular calls it directives.”

Custom Angular directives

I am not going to discuss so much about custom directives basics here. In this blog I am just focusing on use of $scope into directives.

So, when we create a custom directive it has a default scope, which is the parent scope (the controller’s scope from where the directive is called). This behavior is by default, until and unless we do not set the scope.

As we know that whenever we define a directive, there is a “directive definition object” (DDO), in which we set some parameters like- restrict, template, require, scope etc.

In this blog I will talk about the scope properties, they are  false, true, {}.

Let’s discuss them one by one.

Angular JS Dhananjay Kumar debugmode Microsoft MVP http

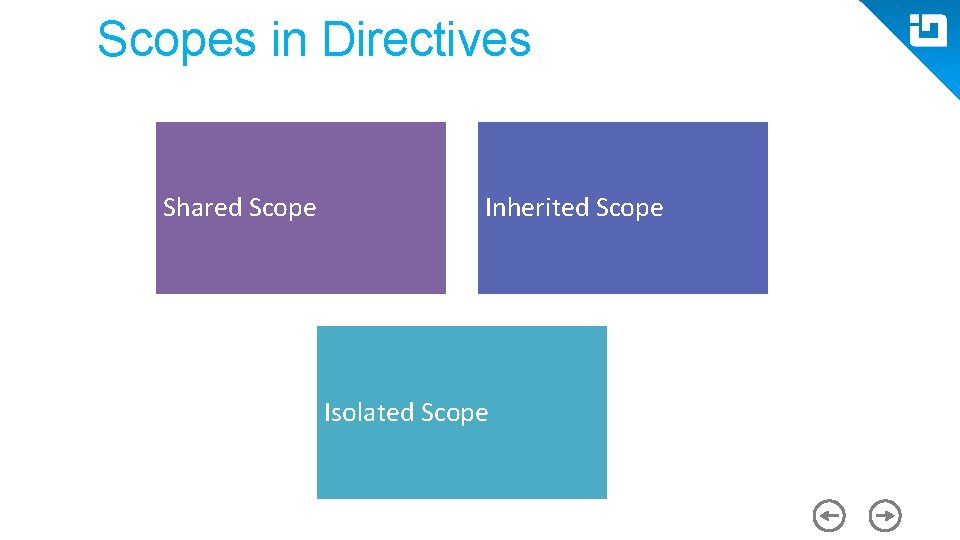
Scope : false (Shared Scope)

In layman language false is assumed as no, so if the scope is set to false, then it means use parent scope in the directive and do not create a new scope for the directive itself. It just uses the scope of respective controller. So let us suppose if we have a controller named “homeController” and a directive “printName”, then in printName directive we will get parent scope by default and any change in scope values, either child or parent, will reflect in both.

Scope : true (Inherited Scope)

Using this property, the directive will create a new scope for itself. And inherit it from parent scope. If we do any changes to the controller scope it will reflect on directive scope, but it won’t work the other way around. This is because both of them use their own copies of scope object.

Scope : {} (Isolated Scope)

One of the important features, its called isolated scope. Here too the directive will create a new scope object but it is not inherited by the parent scope, so now this scope doesn’t know anything about the parent scope.

But the question arises, if we do not have the link from parent scope then how can we get the values from it, and how can we modify it ?

The answer is- set the objects property into DDO, but for this it is necessary to set on attributes into the directive.

In isolated scope we use three prefixes which helps to bind the property or methods from the controller (parent scope) to directive (isolated scope). Lets understand how this works.

Whenever a directive finds any prefixes in its scope property in DDO, it checks it in directive declaration (in html page where the directive is called) with attribute declared on this element. We can also change the name by giving a separate attribute name after any of the prefixes.

These are @, =, &

‘@’ : One way binding

One way binding means a parent sending anything to the directive scope through the attribute, gets reflected in the directive. But if any change in the directive happens it will not reflect in parent. The @ is used to pass string values.

‘=’ : Two way binding

This is called two way binding, because the parent scope will also reflect to directive scope vice-versa.

It is used for passing object to the directive instead of string. This object could be changed from both sides, from parent or from directive. That is why it is called two-way.

‘&’ : Method binding

Used to bind any parent’s method to directive scope. Whenever we want to call the parent methods from the directive we can use this. It is used to call external (outside of current scope) functions. Overall “&” is used to pass data as a function or method.

In this example the directive creates a property inside its local scope, that is swapData. We can also understand swap as an alias for swapData. So we pass a method to ‘&’ which is then invoked by the directive whenever required.

Summarizing, Shared scope (sharing the same scope and data, can not pass the data explicitly), Inherited scope (parent scope values can be fetched into child but child means directive scope will not effect parent), Isolated scope (both controller & directive do not share the scope & data, we can explicitly pass the data using some parameters that is @, & ,= ).

ExoPlayer and UI customization

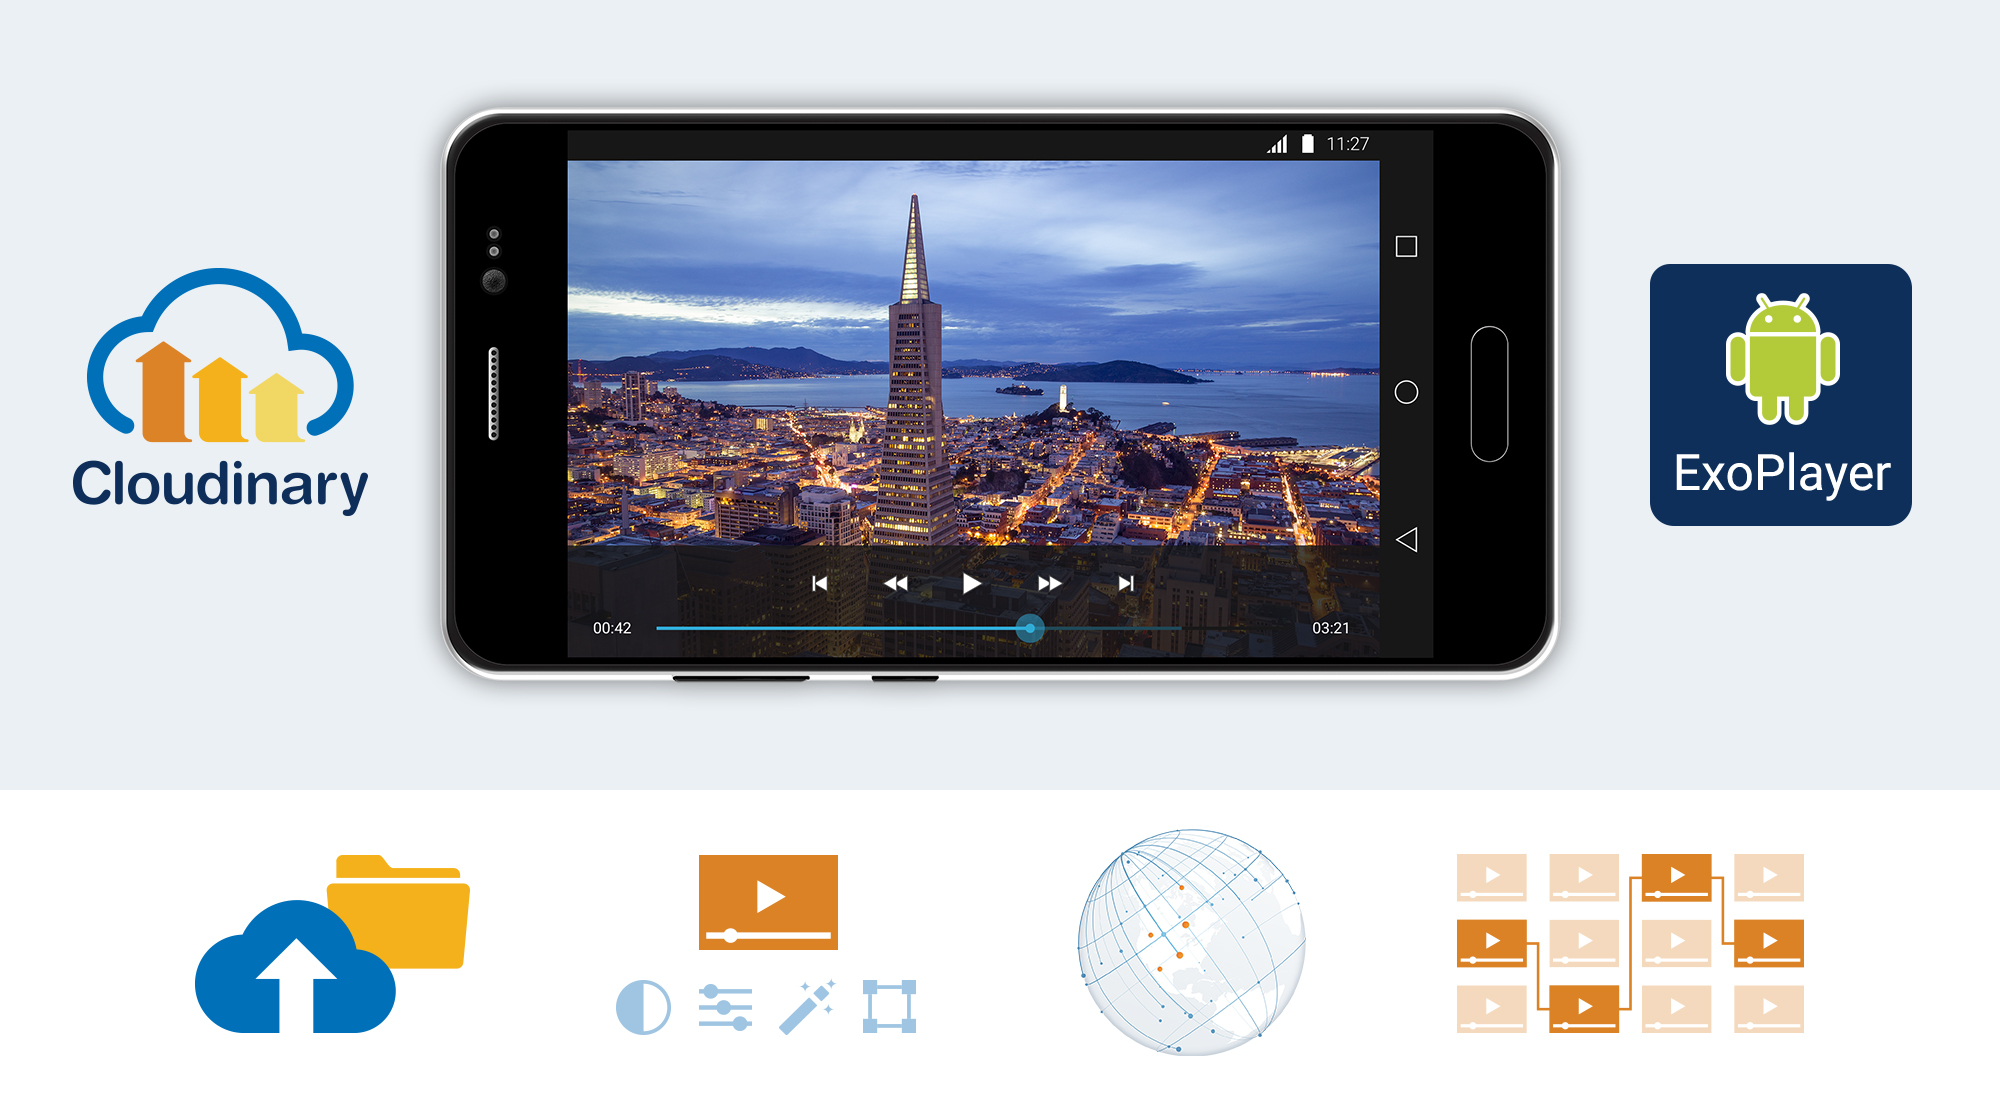
In this blog, we will learn how to detect different events of ExoPlayer and how to customize its UI components. The feature to customize the ExoPlayer UI components is available from V2.1.0 onwards.ExoPlayer events and UI customizations | Humble BitsSo let’s start with ExoPlayer events first:

Events

  • ExoPlayer.EventListener: This event listener gets called when there are any changes in player state. For example, this listener will get called if we change the seek position of the player or if we change the current playing track. There are several callbacks related to this event listener:
    • onTimelineChange(): called when the duration of the source has been determined.
    • onTrackChange():  called when the source track has changed.
    • onPlayerError(): called when some error occurs in playing the source file.
    • onPlayerStateChange(): called when the player state changes from one to another. The possible player states are idle, ready, buffering, paused, playing, stopped, completed, error, etc.
    • onLoadingChange(): called when the source starts or stops loading.
    • onPositionDiscontinuty(): called when the source seeks to some position.
    • onPlaybackParameterChange(): called when the current source parameter gets changed.

ExoPlayer Android Tutorial: Easy Video Delivery and Editing

So if you want to perform any operation or any customization during any of these events, then you can implement this listener. To start getting callbacks for any of the events mentioned above, you can set the ExoPlayer.EventListener to your player object using the addListener() method of the SimpleExoPlayer class.

  • AudioRendererEventListener: This listener can be used to listen to events related to audio rendering. For example, this listener will get called if the audio format gets changed or if the audio decoder gets initialized. Below are the available callback methods of the AudioRendererEventListener:
    • onAudioSessionId(): called when the first audio frame gets rendered and a random integer id is assigned to the audio stream.
    • onAudioDecoderInitialized(): called when the audio decoder gets initialized and the audio is ready to play.
    • onAudioTrackUnderrun(): called when the audio track gets cut down because of any reason by the ExoPlayer.
    • onAudioInputFormatChanged(): called when the audio format gets changed from one to another.
    • onAudioEnabled(): called when the audio track is enabled by the track selector.
    • onAudioDisabled(): called when the audio track is disabled by the track selector.

To start getting callback events for any of the above-mentioned methods, you can implement the AudioRendererEventListener. You can set this listener to the ExoPlayer object by using the setAudioDebugListener() method of the SimpleExoPlayer class.

  • VideoRendererEventListener: This listener can be used to listen to events related to video rendering. For example, this listener gets called when the first video frame is rendered on the screen or if a video frame gets dropped because of any reason. Below is the list of available callbacks of VideoRendererEventListener:
    • onDroppedFrame(): called when any video frame gets dropped by a player because of any reason. It will also give you the count and duration in milliseconds for the dropped frame.
    • onVideoSizeChanged(): called when the size (resolution) of the video gets changed.
    • onVideoInputFormatChnaged(): called when the source file format changes from one format to another.
    • onVideoEnabled: called when the video track is enabled using a track selector.
    • onRenderedFirstFrame(): called when the first frame of the video track gets rendered.
    • onVideoDecoderInitialized(): called when the video decoder gets initialized and the video is ready to play.
    • onVideoDisabled(): called when video track is disabled using a track selector.

To start getting callbacks for the above-mentioned events, you can implement the VideoRendererEventListener. You can set this listener to the ExoPlayer object using the setVideoDebugListener() method of the SimpleExoPlayer class.

Use of these events is optional. You are free to set the listeners if you need the callbacks. For example, if you want to perform any action when the video size gets changed then you can set the VideoRendererEventListener on SimpleExoPlayer via setVideoDebugListener() or if you want to perform any action when the audio decoder is initialized, you can set the AudioRendererEventListener on SimpleExoPlayer via setAudioDebugListener().

Now, let’s look at the ExoPlayer UI components.

UI Components

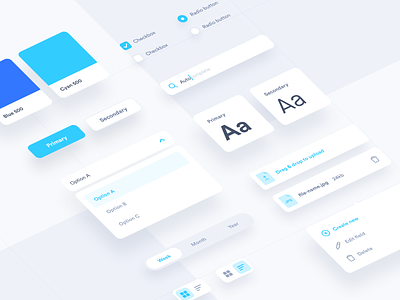
UI Components designs, themes, templates and downloadable graphic elements on Dribbble

  • PlaybackControlView: It is a view for controlling and managing different actions on the ExoPlayer instance. PlaybackControlView displays standard controls like play/pause, seekbar (for displaying the total duration and current duration), fast-forward and rewind.
  • SimpleExoPlayerView: It is a high-level view for ExoPlayer to display video, subtitle, and other standard player controllers.

Use of these UI Components is also optional. Developers are free to customize the complete view by implementing their UI components from scratch as well if they want. ExoPlayer has provided the privilege for full customization of UI components. These UI components can be customized in three different ways.

  • By setting attributes (or calling corresponding methods) on the views.
  • By globally overriding the view layout files.
  • By specifying a custom layout file for a single view instance.

Full documentation of these three different ways to customize the attributes is available on the official website of ExoPlayer JavaDoc of PlaybackControllView & SimpleExoPlayerView.

5 attributes are used to customize the ExoPlayer UI.

  1. use_controller: If you want to display the playback controller, set it to true else false.
  2. show_timeout: Input can be any long value which accepts the value in milliseconds. This is the controller view timeout.
  3. fastforward_increment: Input can be any long value which accepts the value in milliseconds. This is used to skip the video playback position forward with the input value. The default value is 15 sec.
  4. rewind_increment: Input can be any long value which accepts the value in milliseconds. This is used for moving playback position backward with the input value. The default value is 5 sec.
  5. controller_layout_id: If a developer wants to make the design of controller by themselves then they can design any layout XML file and can pass it to controller_layout_id.

That’s all for this blog. This blog was all about the different types of events and how to customize some basic UI components of ExoPlayer.

Windows 8 paired with Ubuntu 12.10: DUAL BOOT

I started with Ubuntu installation on Windows 8 and little did I know that it will have its own new complications. Lets try to understand!http://www.ubuntu.com/Since I had Windows pre-installed, the obvious suggestion to use ‘WUBI.exe’ was thrown at me. I went to the Ubuntu site to download the installer and got the Ubuntu 12.04 set up from the team. All I had to do was to let WUBI handle the installation and it would have been done but, it failed.

Dual-boot Windows 8 and Ubuntu 12.10 in UEFI mode | LinuxBSDos.com

My second attempt.

I made the USB installer from 12.04 Ubuntu setup. First, I had to download the USB installer and later insert the pen drive. Second, I had to run the installer and let it handle the rest. After you get the USB installer prepared one has to boot the system from the USB and for that one has to reach the BIOS set up first. Another interesting point, ‘do you know how to reach the BIOS setup on windows 8?’. Windows 8 works on UEFI technology and thus gives you a span of only “.2” seconds to hit the Del/F2 button bang on at the right time. Try to give it as a challenge to someone and you can bet 1000000$ bucks on it cause he will not get that done in his lifetime! Right!

http://www.ubuntu.com/download/help/create-a-usb-stick-on-windows

Another option is to go to the Windows setting from the start menu and to reach the General option. There the smart Windows 8 will ask you whether you want to boot again using other source like USB/DVD/CD. So, that will work if you have a USB/DVD/CD connected to the system. Remember only one! But the USB installer also didn’t work cause of what I later found out is the Windows 8’s UEFI feature.

UEFI stands for “Unified Extensible Firmware Interface”. The UEFI specification defines a new model for the interface between personal-computer operating systems and platform firmware. The interface consists of data tables that contain platform-related information, plus boot and run time service calls that are available to the operating system and its loader. Together, these provide a standard environment for booting an operating system and running pre-boot applications. UEFI would not support any OS without the UEFI feature so I had to do what I did next.

Got the Ubuntu 12.10 version and after a good hour and some minutes of my precious Ubuntu download I again made the USB installer. Do you want to know why I didn’t choose the WUBI.exe option? Well, when using WUBI.exe, I was given a choice from 3 GB to 30 GB for the Ubuntu storage, to which my team member informed would be insufficient. Like anybody in a similar situation, I too went with the ‘Boot using USB’ option but to my horror even this didn’t work.Hmmm!

http://releases.ubuntu.com/quantal/

New Mantra – “Disable Secure Boot”

After disabling the Secure Boot option in Windows 8, I got the Ubuntu USB installer working. I rebooted my system again to find that I didn’t get the option of Windows reboot! Do not worry as I didn’t write this blog without any prior success with the Ubuntu installation ;). Ever heard of “boot-repair”. Download it from the Ubuntu link and run on Ubuntu, reboot and success! ?

https://help.ubuntu.com/community/Boot-Repair

How to use Mockito in Android

Unit testing is an important part of any product development lifecycle. The main purpose of unit testing is to test components in isolation from each other and that is how our code should be written as well. To achieve this task of writing test cases for a class in isolation from the others, there are times when we need to mock some objects or data while writing our JUnit test cases. As the name Mockito suggests, it is a framework that allows us to do just that.If the UI related part of our code is already tested by some testing framework like Espresso, then it need not be tested again. Also, we do not need to test code that relies on the Android OS. So, we can use Mockito to test our non-UI or functional code that is not dependent on the Android OS.How to use Mockito in Android | Humble Bits

By default, when we run our local unit test cases, they run against a modified version of the android.jar file which does not contain any actual code because of which, when we try to invoke any method of an Android class from our test case, we get an exception. This is done to ensure that we test only our code and do not depend on some default behavior of the Android classes. We can also change this default behavior of throwing an exception to return zero or null values. However, we should avoid this as it could cause regressions in our test cases which are hard to debug.

We can substitute Android dependencies with mock objects. We can use Mockito for this to configure our mock objects to return some specific value when they are invoked.

Mockito Integration

Mockito and JUnit Integration Using Maven Example || Mocking in Unit Tests with Mockito - YouTube

To integrate Mockito in our Android apps, we first need to include the following dependencies in our app level build.gradle file.

Once we have added the required dependencies, we will create our test class in the directory module-name/src/test/java/, and add the @RunWith(MockitoJUnitRunner.class) annotation at the beginning of this class. This annotation tells the Mockito test runner to validate if the usage of the framework is correct and it also simplifies the mock object initializations.

We have to add @Mock annotation before the field declaration of any object we want to mock.

We can use the when() and thenReturn() methods to return a value when a particular condition is met in order to stub the behavior of any dependency.

Now, let’s have a look at a sample test class. The sample below checks that the method getHelloWorldString() of the class ClassUnderTest matches a given string.

How to Mock

We have 2 methods, mock() and spy() that can be used to create mock methods or fields.

Using the mock() method, we create complete mock or fake objects. The default behavior of mock methods is to do nothing.

Using the spy() method, we just spy or stub specific methods of a real object. As we use real objects in this case, if we do not stub the method, then the actual method is called.

We generally use mock() when we need complete mock objects, and use spy() when we need partial mock objects for which we need to mock or stub only certain methods.

Mocking Behaviour

Let’s look at how we can use Mockito methods to mock behaviour of the mock or spy objects we create.

when() :
It is used to configure simple return behavior for a mock or spy object.

doReturn() :
It is used when we want to return a specific value when calling a method on a mock object. The mocked method is called in case of both mock and spy objects. doReturn() can also be used with methods that don’t return any value.

thenReturn() :
It is used when we want to return a specific value when calling a method on a mock object. The mocked method is called in case of mock objects, and real method in case of spy objects. thenReturn() always expects a return type.

Now, let’s look at the common assertions we can use to assert that some condition is true:

assertXYZ() :
A set of assertion methods.

assertEquals(Object expectedValue, Object actualValue) :
Asserts that two objects are equal.

assertTrue(boolean condition) :
Asserts that a condition is true.

assertFalse(boolean condition) :
Asserts that a condition is false.

With the combination of the above mentioned methods and assertions, we can write test cases using the Mockito mocking framework.

Advantages & Disadvantages

Let’s have a look at the advantages and disadvantages of Mockito:

Advantages

  1. We can Mock any class or interface as per our need.
  2. It supports Test Spies, not just Mocks, thus it can be used for partial mocking as well.

Disadvantages

  1. Mockito cannot test static classes. So, if you’re using Mockito, it’s recommended to change static classes to Singletons.
  2. Mockito cannot be used to test a private method.

There are a few alternative mocking libraries like PowerMockRobolectric and EasyMock available as well which can be used.

Design Thinking in Healthcare

Design Thinking, at its core, is a creative process to solve everyday problems with a human-centered approach. While the word ‘creative’ may sound like something do only with designers/artists, the good news is- it’s not. Anyone can implement design thinking. The only thing that you really need is- listen to your customers as people who need your help. Once you understand their needs, their hopes, their fears and the friction they face while dealing with a particular problem- Bang! You are halfway through it.

Let’s hear a story. The story is about a woman named Elisa (yeah! I made that pseudonym). Elisa is an eighty-one-year-old woman suffering from age-related macular degeneration (AMD). When she was told she needs to take an injection in the eye for treatment, she was petrified. And why wouldn’t she? It’s not just any injection on the skin, it’s a needle in the eye. At the age when you are struggling with survival, it’s terrifying to think of ways in which you can go blind.

Why Design Thinking in Healthcare Matters

Apart from this particular case, it’s a fact that many of us dread getting an injection. Diabetic patients go through this painful experience, every day. Sometimes they have to administer these injections themselves, and sometimes they have to deal with a less skilled, less empathetic nurse.

Don’t you think we need a better solution to this? Can’t we develop something which makes this experience less scary? Can we go that extra mile and feel the pain of these patients? Can we somehow make them suffer less than they are already suffering?

An organization called Portal Instruments has now challenged this 160-year-old needle & syringe technology with design thinking. They have created a needle-free computerized injection system which fires a jet of liquid into the human skin. The handheld, low-cost unit is highly precise and accurate. The device is easy to use and its digital health features empower the patients to holistically manage their chronic condition interactively.

Design, particularly in healthcare, is about efficiency, usability, and a better user experience for patients as well as medical practitioners. And Design Thinking is a very powerful approach to solve customer’s problems. So where can you apply design thinking in healthcare?

Design Thinking in Patient Care

How Healthcare Organizations Can Start to Use Design Thinking | PreCheck

Patient care is not just about exchanging pleasantries and moving ahead with the treatment. When you apply Design thinking to this process, you will uncover ways in which care goes beyond the treatment.
A customer empathy map will help you understand your patient’s pain, concerns, fears and go beyond the clinical treatment. For instance, simply by listening to the concerns of expectant mothers, you can help them ease their anxiety. After quality research & brainstorming viable solutions, you can arrive at a proposed solution to help them be better informed about the labor process.

Design Thinking in Clinical Experience

Memorize the last time you were sitting in the emergency-room and recollect your waiting experience. Wait times are difficult to pass. You are in a troubled state of mind. Patients and their families spend a considerable amount of time in waiting rooms, sometimes waiting to be treated and other times waiting to see the doctor.

Design thinking may bring forth innovative ways of helping patients feel comfortable and make their experience bearable. You can start by asking questions and understanding their mindset. Must the patient be left alone while they wait for care? Is there a better way in which family wait time can be utilized? If you can not reduce the wait time, think of ways to utilize it. Once you answer these questions, you’ll be able to elevate the user experience of your users.

Design Thinking in Websites

If you are building a healthcare app/website, then you have to take care of the reliability and accuracy of the information that you provide. A person’s medical records can be critical information while monitoring health patterns or detecting disease symptoms.
Prioritize the most important information & fields for your users. Boil down to basics. Take all age groups into account and design keeping in mind their ailments.
They (might) want more information with less number of clicks, they (might) wish for larger and readable fonts. And while you may get away with frequent ‘small’ updates on social media apps, here it (might) frustrate them.

How to design a great Healthcare Experience

You know why every superhero is veiled behind a mask? Because creators of comic heroes want you to believe that even superheroes are like any other human. Their only superpower is endurance and resilience. They understand people; they want to solve their problems. They put people before anything else.
Much like Spidey! Or Batman.

Design thinking is same. It’s about organizing those mindful scattered ideas that everybody forgot to care about. Design thinking is about subtle differences which make you outshine from the ordinary. Yet it’s not so easy to put yourself in some else’s shoes. It takes a lot of efforts in brainstorming and generating ideas. Then, you should quickly pivot on a prototype and gather user feedback for continuous improvements.

Design thinking has already made it to healthcare. But, as we all are aware of the sad state of product design and innovation in Healthcare, there are still areas where it remains underused, such as patient transportation, the communication gap between doctors and patients, to name just a few. Here’s one approach that might be useful to you-

Research and define the problem statement

If you are dealing in the food business, wouldn’t you start talking to the farmers? So, start with conversations. Talk to patients/families about their problems.
Build customer personas. A persona is an imaginary character that embodies your real customer. Learn about your user’s lifestyle, their goals, their values, the challenges they face. Empathize with your users & their problems.
If you are designing an online appointment experience, you need to involve every single person associated. Right from the doctor to the patient. Even the receptionist. You need to understand their roles and most importantly, where they fit in together. Once you understand their pain points, then you’ll be able to create the experience for patients who need care.

Ideate

Design Thinking in Healthcare – IDEO U

Enough talking! Time for some action. Gather all that you have talked and use the outcome of Research phase to generate interesting ideas. Not all ideas will be usable; so try and stay close to ‘potential solutions’. Use techniques like high-level drawings, user-mapping and plot a user’s experience map to arrive at innovative solutions.
For instance, while building a SaaS-based mobile engagement platform for one of our client, our design team took conscious efforts to understand the whole journey- health plan benefits, treatment requirements, appointment details, communication medium, medication instructions etc.

Putting down our ideas on paper helped us a lot in working on user workflows. We were able to visualize a smarter workflow which connects with patients through mobile messaging for more effective communication.

Prototype and iterate

Giving your ideas a shape is crucial to the design thinking process. Otherwise, it will just be castles in the air. Prototyping is something that pushes you into making things tangible so that you keep moving forward.
Prototypes will be a proof of concept of your ‘ideation exercises’. They will help you in demonstrating and validating your concepts and understanding. Moreover, they are important because you would want to test your functionalities in a real environment with real users.

Prototypes need not be beautiful. It can be a black and white template of your colorful understanding. It must answer a simple question- as simple as “How would you like to reach out to your members?”

Depending on your application (web/mobile), prototypes can be interactive or static. What really matters is that they must convey the user experience flow.

The advantage of building a prototype is that it’s something substantial and not just some thought process going on in our mind. Once you have pushed that into a real environment, you can take feedback from users and iterate to simplify functionalities.

Designing for healthcare won’t be a joyride. Unlike social media apps like Snapchat, your healthcare platform will grow slowly. And that’s not your mistake. The user base that you are catering to, is not looking for socializing or entertainment. So the only solution lies in applying design thinking to approach problems.

Before aiming for success, first, offer a service that’s valuable. Offer a service that solves a real problem. Offer a service which makes them forget that they are interacting with a machine.
Let’s build a better healthcare experience. Let’s be more human.

Basics of Espresso

Unit testing is an essential part of any development lifecycle. Writing unit test cases can come in handy when we want to make sure that our code still works as expected even after code changes have been implemented.Espresso Testing Tutorial - TutorialspointIn Android, we have two types of unit tests that we can write:
  1. JUnit Test Cases
  2. Android Instrumentation Test Cases

JUnit test cases are test cases that can run on the JVM. It is preferred to write JUnit test cases as they can run directly on the JVM and are much faster. While writing local unit test cases, if there is any dependency on the Android system, those dependencies can be mocked using a mocking framework like Mockito.

Android Instrumentation test cases, on the other hand, need the Android system to run. They need an actual Android device to run on. They should be used if the test cases rely heavily on the Android system like the Android UI. As they first need to be deployed on an Android device before they can run, they are usually slower than local unit tests.

In this blog, I will talk about how we can write basic Espresso test cases to test the Android UI.

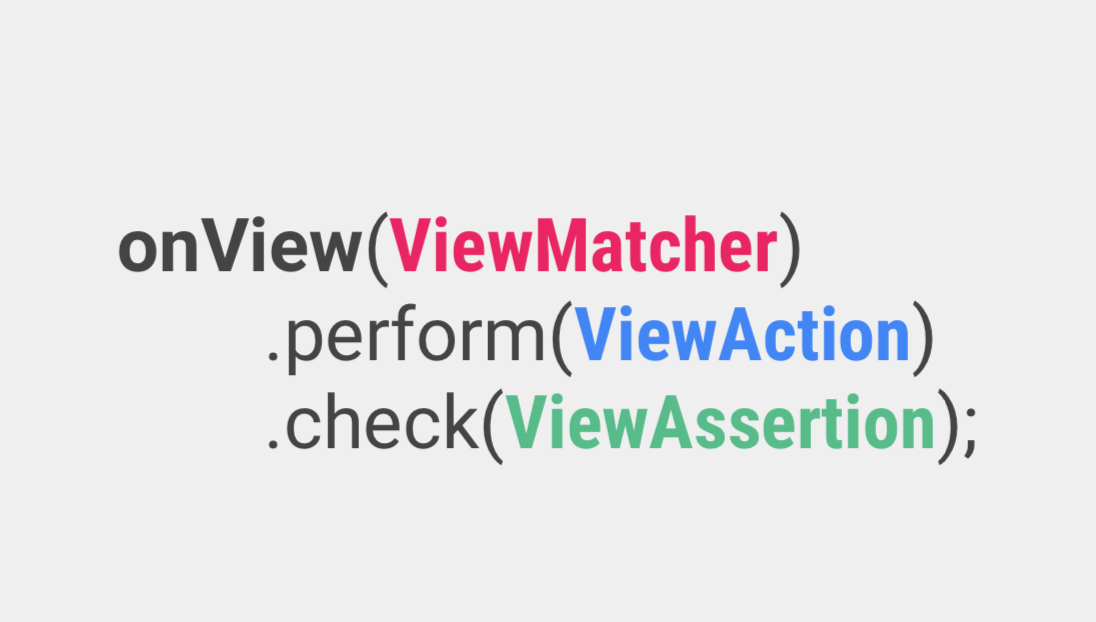
Espresso has 4 main components which are:

Espresso Recipes for Android - Part 1 - Hearth | by Dogan Kilic | Medium

  1. Espresso – It is the entry point for any interaction with views (using onView() and onData()). It also exposes certain APIs that are not specifically linked with any view, like pressBack().
  2. ViewMatchers – They are a collection of objects implementing the Matcher <? super View> interface. One or more matchers can be passed to the onView() method to find a view inside the current view’s hierarchy. In case the view that we are trying to match is not present in the view hierarchy, Espresso throws a NoMatchingViewException.
  3. ViewActions – They are a collection of actions (ViewAction) that can be passed as an argument to the ViewInteraction.perform() method to perform some action on the view, such as click().
  4. ViewAssertions – They are a collection of assertions (ViewAssertion) that can be passed as an argument to the ViewInteraction.check() method to assert some state of the view. Most commonly used ViewAssertion is the matches assertion, which uses a ViewMatcher to assert the state of the currently selected view.

A complete list of the available ViewMatcher, ViewAction, and ViewAssertion can be found in this Espresso Cheat Sheet.

Now that we know the basic components of Espresso, let’s see how we can integrate Espresso into our Android projects. Let’s start with setting up our test environment.

It is recommended to turn off system animations on the device on which the tests will be run. This should be done in order to avoid test flakiness. Go to Settings -> Developer Options and turn the following 3 animations off:

  1. Window animation scale
  2. Transition animation scale
  3. Animator duration scale

We can override beforeActivityLaunched() to execute any code that should run before our Activity is created and launched.

We can override afterActivityLaunched() to execute any code that should run after our Activity is created and launched but before any test case is executed.

We can override afterActivityFinished() to execute any code that should run after our Activity has finished.

Methods annotated with @Before annotation are executed after the activity is launched and before the test case is executed.

Methods annotated with @After annotation are executed after the test case is executed and before the activity finishes.

ActivityTestRule rule provides functional testing of a single activity, that which is specified in the ActivityTestRule. This activity will be launched before executing every test annotated with the @Test annotation. ActivityTestRule has 3 constructors:

The activityClass parameter indicates the activity class that needs to be launched before every test.

The initialTouchMode parameter indicates whether the activity should be launched in touch mode.

The launchActivity parameter indicates whether the activity should be launched by default before every test case is executed.

Let’s see how we can pass some data to the activity before any test cases are executed. There are two ways in which this can be achieved.

First, we can use the 3rd ActivityTestRule constructor along with the @Before annotation to achieve this. Passing the launchActivity parameter as false indicates that the activity will not be launched by default. The method annotated with the @Before annotation will be executed before every test case

The second way is to implement the ActivityTestRule constructor and override the getActivityIntent method. The getActivityIntent method returns the custom intent that we build and this intent is then available to the activity under test after it’s launched.

We have seen how to setup Espresso and how simple test cases can be written. I hope this article motivates you to implement Espresso in your Android applications for UI testing.

Employing Automation to test Data Interface

Say, you got a DB comprising of huge data with billions of records. You have to showcase it on UI only after making sure that everything you want to represent on UI is accurate and as expected. Incorrect data could impact your business in unknown and serious ways that can lie undetected for months.So, here you might need to plan a new strategy, which should lead to answers of all your questions.One of the finest approach among this strategy should be- to make sure that everything you are showing is validated and verified. This leads to a special type of testing called as Data Interface Testing.

What is Data Interface Testing ??

What is Interface Testing? Types & Example

Before we go ahead with Data Interface Testing, let’s first discuss about data interface. Lots of application in the market are nowadays based on Data Mining or Big Data concept. This helps to streamline the big data and showcase on UI in an adequate manner.

Now, as many people say that there is always some pros and cons for each process. Similarly, even this one has few. One of the biggest one is showcasing huge data. But I have a solution.

There is always a challenge to show the huge data on UI where everything is placed at their respective place with correct data set and correct orientation (if you’re showing the data in graphical representation).


So, the interaction between database and User Interface brings the term Data Interface. And to make sure that it works well both ways i.e. request and response results, we call it as Data Interface testing.

Big Question !! 

Can I test this much of data and all of that manually??

Answer is yes, it is possible. But practically not a good way to do the same.

So what …?? Automation ??

Yes.

But what if I don’t have any good knowledge for it ?

Don’t you worry, we got a cheat for you !!!  A tool to test data interface automatically, with a very basic knowledge for Automation/coding.

Automation Tool

Some Info Regarding this tool
This tool is made to test validation and verification of data between database and user interface. To make this tool useful, one can easily use it on it’s own working environment, by customizing the details in provided file and coding as per their requirements. .

How this tool works ?

With it’s main class, it reads multiple files which further executes the methods written in those properties.

For reference, the source code is mentioned below:

Representing Main Class of Tool

Method written in above class is dependent upon various files. One of them is called as Property_Reader file.

This is a custom made file, which executes multiple methods and brings result for main class.

1. Property_Reader_Method

2. db_property

This file comprises of all properties, which helps in setting up connection with server/DB.

Following are the properties used in this file.

  1. Url=jdbc:presto://10.0.11.198:8080/test/default
  2. UserName=root
  3. Password= 12345
  4. ClassName=com.facebook.presto.jdbc.PrestoDriver
  • You can change your URL and credentials as per available server(s).
  • Password can be null too. Depends upon the server details.
  • For current we are using presto as DB.

3. query_column

This comprises of column name for which data needs to be fetched from DB. For every query there should be a unique query name which must be identical in all property files for that query.

For below mentioned example. “testA_count” is the name of query which is unique from rest of the two but same in other property files for queries with same conditions.

Apart from that, irrespective of number of columns available in expected and actual query, it will only bring data for “Column A” column in the result set.

Same case for others too.

4. query_actual

This property file contains the queries created by developers or fetched through server logs file which are created while accessing the application through UI.

5. query_expected

This property file contains the queries created by testers.

By running the above mentioned code for main class, it will create a new result file every time. This file will comprise of end result for executed queries, having expected and actual result with numbers and pass/fail result.

For Failed Case:

Let’s change the actual query to-

Points to be considered:

  • Make sure that the query name should always be the same in all expected, actual and column property file.
  • For every query there should be a unique query name.

Benefits of using this tool are:

  • Any Structured DB can be used for this eg. Presto, MySQL, MS-SQL etc.
  • Platform independent. Can be run on Windows/Ubuntu/Linux.
  • Can be run on a project written in any language.
  • Doesn’t require any prior coding skills or automation knowledge.
  • One can easily put the expected and actual test case in respective property files and can have the result set, with complete information.
  • Can be easily customized as per available resources/requirements


MeteorJS

What is MeteorJS?

What is MeteorJS? | Guide to What is MeteorJS with Career Scope

MeteorJS is a javascript framework to create web applications. It is built on the top of NodeJS and uses MongoDB as a storage layer.

Components of Meteor

There are 5 major components on which MeteorJS is built upon.

How does ddp work in meteor? - Quora

BlazeUI

Blaze UI | Tracxn

This library of MeteorJS is helpful to give live updates to users. This library is responsible for updating DOM. It is just like AngularJS where in DOM you have to just tell what you want and if there is any update, it will take care of that.

MongoDB

Thousands of MongoDB databases compromised and held to ransom – Naked Security

Meteor project comes with MongoDB, without writing any configuration file. It can be accessed from the remote by adding 2 in the Meteor server port. For instance, if Meteor is running at 3000 then MongoDB will run at 3002 port. The MongoDB files are in the .meteor directory of the Meteor project.

DDP

Distributed Data Protocol(DDP), is a communication layer between client and server. It is based on web sockets. Everything that happens between client and server is only through DDP. The client and server do not know each other. Client and server both don’t need to be of Meteor. Meteor clients can talk to other servers who understand DDP and Meteor servers can talk to other clients who understand DDP.

Live Query

It is a communication layer between and server and database. It continuously listens to the database and sends updates to the server if anything happens in the database. So if anything happens in the database, you will get updated results on the screen without hitting the refresh button. In general, it requires a separate implementation for each database.

Benefits of Meteor

1. You can get real-time updates without writing an extra code for it.
2. Packaging system – You can save lots of time by using MeteorJS packages. Many built-in packages can be used as it is. Using packages and writing your package for others is also very easy. Rails developers can think of a gem as a package.
3. Learning curve is low. You need to have command over javascript because MeteorJS uses javascript on both the client and server-side.
4. Meteor itself minified the javascript and CSS in production mode.
5. Meteor automatically syncs the state between client and server.
6. The community of Meteor is very active and supportive.

An Example

Below are the few commands that will install MeteorJS and then it will create the project for authentication.

Installation

$ curl https://install.meteor.com/ | sh

To create an application with name authentication

meteor create authentication

The output of the above command will be-

Run Application

Go to authentication directory – cd authentication

Type command – meteor
Open the browser and go to http://localhost:3000
By executing the above commands you will see something

Add package

meteor add accounts-base
meteor add accounts-password
meteor add accounts-ui

The above 3 commands will add authentication packages

Display buttons on UI
Add below line in authentication.html and comment {{> hello}} line

{{> loginButtons}}

The above line will give you the ‘Sign in’ link on your browser and when you click on that link you will get ‘Sign in Form’ and other links that are required for authentication


Software Metrics for your Product Development

Developing a quality software product falls under the realm of software engineering. The ever changing user requirements and harsh project timelines pave way for cost overruns or delays in the delivery schedule. So, bigger the scope of your project, more complex the functionality becomes. With so many factors it is very easy to lose control over the quality processes to develop an excellent product. We know that no engineering is complete without accurate measurements; which further brings us to the point that all measurements are done by applying certain metrics.For this reason we need software metrics for transparent and quality delivery of the product. Because when you measure what you speak about, you have numbers to express your failure or success. You have a calculated expression which shows you where you lacked and places you stood well. In Bob Parsons’ words-‘Anything that is measured and watched, improves.

Software Metrics to Improve Development: What and How to Track

Now the question arises- which software metrics to use?

One option is to pick a set of predefined metrics. The other one is you can first define the product requirements, discuss with the various stakeholders and then set the required metrics.

For a better understanding, consider an analogy when you are backpacking for an adventure activity. Would you pack a parachute if you are going for kayaking?


Absolutely not.


Instead, you would first decide upon the adventure sport, do a bit of research and accordingly pack your adventure gear. So, if you are going for paragliding, pack your bag with a helmet and a harness.

You can leave the oars behind for the next time.

Defying the law of gravity? It’s okay. But make sure you don’t cause more harm than good in the project. For this reason, it is important to apply the right metrics at the right stage in the product development cycle. As a software development company which builds engaging products.

1. Team Velocity Points

In simple words, team velocity measures the average speed of your team towards achieving its goal during one sprint. The fact that a typical sprint goes on for about 2-4 weeks, calculation of team velocity points proves to be a valid metric to gather the team’s efficiency.

If you want to calculate your team’s velocity, sum up the story points that were completed during that Sprint. To decide the team’s velocity, a three sprint’s average is usually considered.

Why? It’s an industry standard and it determines the project’s pace at which the functionality is being developed. In simple terms, it tracks the velocity of a Scrum team over time. This metric helps in deciding whether the team can take up more work over time or is the team already overloaded and it need to be reduced.

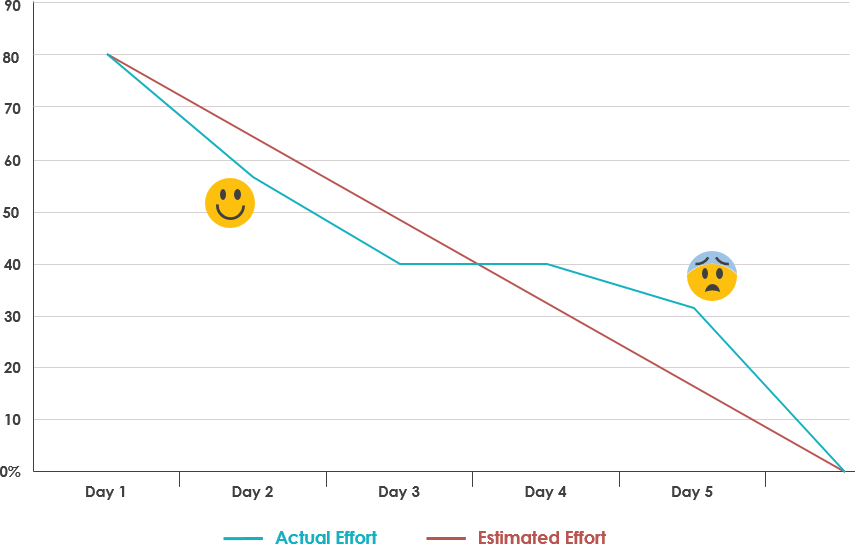
2. Sprint Burndown

What is Burndown Chart in Scrum?

Sprint burndown chart is the most effective tracking metric to visualize the health of the project. It helps in reviewing how much work is pending and if the team needs to speed up or slow down. You can also predict the expected completion date of the sprint. A deviation from the expected burndown will send a red flag to the scrum master to take appropriate actions.

For instance, if burndown goes up at any point during the sprint, it reflects an addition to the existing scope. At this time, it’s important for a team to achieve ‘team’s goal’ first before fetching new items from the backlog.

Why? The Burndown chart indicates the progress of work within a sprint. It shows whether amount of work a team is accomplishing every day will lead to a successful sprint completion or not.

3. Release Burnup

How to Create a Release Burn-Up Chart — Rob Frohman

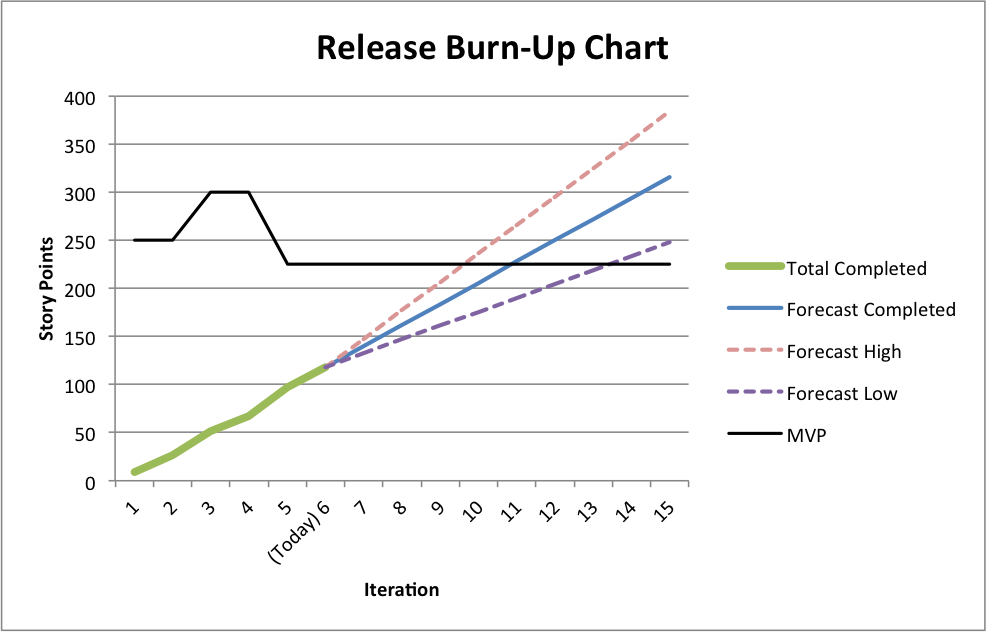
Product owners need to evaluate what should be out in the market first based on their discussions with other stakeholders. Release Burnup helps POs to continuously prioritize product backlog based on how the work is progressing.

If the release date is fixed and there has been a few additions to the initial scope, this is an important metric to align scope with the actual release date by either removing low priority backlog items or attempting to increase velocity by taking suitable measures.

Why? The Release Burnup chart indicates whether the sprints are progressing towards a successful project completion in terms of functionality achieved. Also, gives us a projected date of completion of the project.

4. Estimated Cost vs Actual Cost at Completion

Often there are gaps between the estimated cost projection during the start of the project and the actual cost at completion of the project. This metric gives a measurement of what deviations could have led to this difference in the cost.

Although, almost always the project cost goes higher than the expectation (just like we tend to overspend while shopping), this metric helps you understand what could be the possible cause of cost overrun- be it some design error or some changes in the scope of product development.

Why? Helps us understand what cost we had estimated and what cost was incurred. This helps us in improving our planning.

5. Number of major bugs per sprint

The number is an indicator of the overall quality of the product. When you are working in an agile project, it becomes important to put a budget i.e. count on the number of major defects open in a project at any point of time.

How can we stay within the budget? Reduce the count of defects reported.

How can we reduce the number of defects? Do Not Report!

Yes, I’m kidding.

Here is a better solution- focus at the time of planning, look-ahead and clearly define acceptance criteria before jumping on a sprint backlog item.

The priority of resolving any major bug is over and above implementing any new feature. Because if you can’t resolve what your did wrong, you can not pick a new feature.

At the same time, keep a close watch at the number of bugs reported after production release. If you have not been proactive in refactoring and improving quality of your code, chances are you will receive nasty numbers in this metric. This will help you to identify gaps in testing and take corrective measures

Importance of Usability Testing

When Lyla was asked if she could interview an author on her colleague’s behalf, she jumped at the opportunity. Lyla was interning with an uptown magazine for a role that deemed her ‘unfit’ for any important tasks such as interviewing a popular author. Getting an opportunity to talk to her favorite author was like a jackpot. She thought she is finally gripping onto a childhood dream. She thought she finally can brag about meeting Paula Hawkins. She wanted to be careful about not screwing this golden opportunity, so she double-checked everything on her list.
Notepad, check. Pen, check. Camera, check. Questions, check. Recorder, check! Oh wait! I have to check for a new update, just in case I am outdated.
Which Usability Testing Method Should I Use in 2021? | PlaybookUX

She updated her app quickly and reached the coffee shop before time. She was excited, she was anxious. It’s an easy-peasy task, you just have to ask questions, record them and pour it out later– she kept repeating this in her mind.
But the moment Paula Hawkins walked in, she started feeling the breathlessness. Part excited, part nervous, she could feel her palms sweating. After exchanging some pleasantries they kicked off with the interview.

“Shall we start?”
“Yes, of course. Let me just..umm… Start this thing”
*she clicked on the record button and started talking, simultaneously taking notes.*

Unaware of what was happening after she clicked on that little red button, she went on with the interview, taking down notes as per her whims. Ignorant of the new updated feature — which now needed ‘long press and hold to start recording’, she finished the interview, smiling and pleased with herself. But as she looked down, in order to ‘STOP’ the recorder, she lost the fanatic feel of doing a good job!

A little hover over the button said “long press and hold to start recording” which was an obvious slip.
Game over. She probably lost her mind or her job. Or both. But that’s none of our concern. Right? She should have been more attentive.

Lyla is a fake person. She did not meet Paula Hawkins ever. But the incident is real. Only, it happened with an acquaintance and I figured out it wouldn’t be fair to name her. This incident forced me to shine some light on the importance of usability testing and why it’s more important to pay attention to user’s behavior while they interact with the product.

They say, never talk to your users, they hardly know what they want. But they missed out on the summary-

“To design the best UX, pay attention to what users do, not what they say. Self-reported claims are unreliable, as are user speculations about future behavior. Users do not know what they want.”

Usability testing- What is it?

What is usability testing? - Quora

Usability testing is like black-box testing of an application to ascertain if the product built is convenient to use and easy to learn.

These are methods of testing and observing the behavior of the users to find out what works and what doesn’t work. Users are given specific tasks to complete and when they are at work, observers watch their body language, facial expressions, emotions and encourage them to “think aloud” i.e. speak up whatever comes to their mind while using the product. Doing this exercise we can get qualitative and quantitative data and figure out usability issues with a product.

So, why usability testing is important?

Website Usability Testing: How To Get Started Today | Hotjar Blog

Doing usability testing the right way, at right time with the right set of people reduces the risk of building the wrong product; thereby saving time, money and other precious resources. In other words, if done at an early stage when the product is at paper prototyping stage, it finds the problems when they are easy and cheap to fix. And when done on a product which has attained maturity it helps to understand user’s success rate and time spent to complete a task. There are hundreds and thousands of cases when usability testing proved to be a good exercise in terms of ROI.

For example, a slight tweak in design suggested by usability testing for Mac’s UI, the company got 90% fewer support calls.

Need more clarity about why usability testing is a good idea? Here you go-
#1. To check if product meet user’s expectations
#2. Matches business decisions to real-world use
#3. Removes flaws in the product
#4. Allows you to see how successful users are with their tasks
#5. Useful for getting user reactions and feedback about the product

What are the types of data that we can get as a result of our analysis?

Two types of data results received are — quantitative and qualitative. Usability testing is largely a qualitative research technique and is not driven by statistics like surveys where lots of people participate. Usability testing is done using a small set of people, usually five to seven.

Qualitative methods are very useful to test the stress response of the users like their body language, movement of hands, expressions on the face and squinting eyes especially doing a test on a mobile device.

The metrics we get after usability testing can be quantitative as well. For example, time spent on doing a task, success and failure rates and also the efforts, like how many clicks a user needs in order to complete a task.

Is there a need to record all the metrics obtained from a usability testing?

Yes, keeping a record of the metrics is very important. Why? Because usability testing is not just for designers to understand how to make better designs but it is also an important tool to influence the rest of the stakeholders like clients, their sales/support team, project managers, developers, other designers etc.

Every stakeholder involved may have a different point of view for a design decision. Being subjective by nature, design decision often leads to long debates among stakeholders. Most often design decisions are influenced by a person who holds the highest position among fellow stakeholder or has superior oratory skills.

In short, metrics help us in iterating and validating design concepts. It gives objectivity to design debates and it helps in taking fact-based design decisions.

At what phase of the design process usability testing is recommended?

When it comes to usability testing there are two terms often referred by big names of the UX industry (like Jacob Nielsen) and these terms are Summative Test and Formative Test.

These tests are done at different stages of the design process. They are as explained below:
Formative tests are low-fidelity tests (to gain quick insights)-
#1. During the very initial development phase using paper prototypes
#2. It can be done anywhere and a formal lab is not required
#3. It can be done just between a moderator and a participant

The results from a formative test may include-
#a. Users’ comments in the form of “Thinking Aloud” narrative i.e. their emotions, confusion sources and their reasons for actions.

Summative tests are high fidelity tests (to capture metrics)-
#1. These are carried out at the end of the development stage
#2. At this stage usability of a product is validated
#3. This gives an answer to the question “How usable the product is?”
#4. This gives a comparison against competitor products
#5. Conducted in usability labs or remotely using many tools available where users can do the test using their computers or mobile phones

The results from summative tests may include-
#a. User’s success rate to achieve a goal
#b. The time spent on completing a task

How many users are required to conduct the testing?

“Elaborate usability tests are a waste of resources. The best results come from testing no more than 5 users and running as many small tests you can afford”
Jacob Nielsen

“It is widely assumed that 5 participants suffice for usability testing. In this study, 60 users were tested and random sets of 5 or more were sampled from the whole, to demonstrate the risks of using only 5 participants and the benefits of using more. Some of the randomly selected sets of 5 participants found 99% of the problems; other sets found only 55%. With 10 users, the lowest percentage of problems revealed by any one set was increased to 80%, and with 20 users, to 95%.”
Laura Faulkner

Who among them is right?

It depends on what type of test we are doing and where we are doing it. For example, if we are doing a low-fidelity formative testing we can do away with a small sample size. But if we are doing a summative testing we need a bigger sample size. In the type of testing where we are comparing our site to competitor’s website by using an online tool which is cheap and fast, we can use a large sample size. But we should keep in mind that these online tools like UserTesting or Loop11, they don’t capture metrics. It’s us who has to be aware of how all the participants did it.

So how to prepare a test plan?

That is certainly a good question. You have an inquisitive mind, I must say. But don’t you think that will be too much to digest in one bite?
Still, if you are really into it, give these things a thought-
-Decide what areas to concentrate on
-Determine potential usability issues
-Determine what tasks you want to test

error: Content is protected !!